I think when this boat was built there was a shortage of sikaflex in Bridgend as basically none of the fitting and screws were sealed in (even the below waterline ones in the transom for stepladder).
Luckily its been on dry stack most of its life so its not affected it.
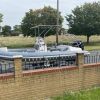
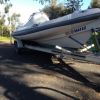
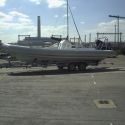
Its weird because the hull seems really well built its just the fit out and rigging that was complete pants. Are newer Cobras any better? What year did they get their act together electrically?
Anyway, these (almost) captive nuts are now sealed in as best I can:

The console bolts on top of these. Im not going to sikaflex the console down in case I want to take it off again. I cant properly seal it anyway as the cable duct comes in and I cant seal that.

Working in the console is a nightmare. I havent tidied all the hydraulic lines yet. Connecting the fuel filler was a pig but a bit of Vaseline made it much easier to slide on. Ordered wrong size vent pipe so waiting on that to come.

Had to recruit a friend to get inside the console to connect the hydraulic pipes as I had had enough of standing on my head

The Cobra ribs didnt really have a traditional conduit (drain pipe) that went from transom to console. There is just a big void beneath the hull with a hole at either end lined with a 4 inch bit of drain pipe. Its quite a good idea as it makes it easy to pull lots of stuff through.
However it gives very little abrasion protection, and not knowing how roughly finished the underside of the deck was, I put everything in individual conduits to protect it. Since I moved the batteries to the helm, I had long leads going back to the engine.
The baler twine is used to yank the assemblies through. I left some spare drawstrings and conduit for future use...

Cables replaced all the way up to the engine. Whats the best thing to protect the engine with. Some sort of spray on grease / sealant? Is saw crc656 mentioned?

Some new pencil coils. I dont know if they were all knackered but for 15 quid each I just replaced the lot. Was going to swap the plugs but they looked like new so didnt bother...

All swapped over, Mercury sealer wanted 1200 quid for that little job alone...

When I was poking around inside the engine I noticed one of the pins in the multi pin connector had clearly been problematic before as it was very corroded / bodged and would not stay in the multi connector. It was cable tied to another cable in the plug but that wasnt really working. I dont know exactly what the wire did but I imagine it could have caused some interesting error codes when it became flakey

I didnt have any pins for the connector so I just bypassed that pin with a bit of wire. Itll do for now and at least wont cause any problems...


 ...??? 60ish nm if memory serves.


 BLACK PIG
 Piglet


 Tickler


 White Noise