Thanks all - fixed it.
Since you were so helpful and maybe to help anyone else this might happen to I thought I would post how I sorted it.
I tried and tried to get a drill - even a cobalt drill into the original hole but it was just a cratered mess. Mostly of my making but also it was full of the stainless bolt that was stuck into the aluminium alloy block and the drill did not like it.
Anyway I decided to make a new hole.
I got the grinder on it and flattened the area next to it.
Then I did not have any room to punch a starting hole for the drill so I found a little diamond tipped dremmel attachment in the dremmel box and was able to use that to make a really good starting hole to stop the drill wandering about.
Then I tried a 5mm drill (amateur error I now know) and got nowhere. I switched to a 3mm 35 cobalt drill bit and it went through it like a knife through butter.
Then I got a 4.8mm cobalt bit and drilled the hole bigger.
Then I got an M5 tap in and tapped the hole - seemingly withouth problem.
The M5 bolt went into the threads no trouble. I did M5 rather than the original M6 becuase logic said to me if I hash it up I can always go bigger and the M5 bolt will be plenty to hold the load. I just used a couple of washers to improve the fit and spacing.
I dobbed a tiny bit of threadlocker onto it too.
So all went well and it's pretty solid now.
Main thing I would have done differently is that I would have used a smaller drill bit next time for the tap. I chose 4.8m but 4.5mm or even 4mm drill bit would have improved the fit I think.
Anyway, all in all sorted and I am not going to take that bolt off ever again... and even if I do take it off and it goes wrong again I can always go up to size M6....
Now I know for some of you engineering experts out there this is a bit of a pigs ear but for my level of experience and knowledge I was actually pleased.
See photos.


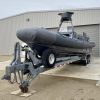
 BLACK PIG
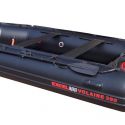 Piglet