If you can, vacuum bag all or part of it to assist evaporation. Pumps are fairly low cost. I made a vacuum chamber using an old saucepan and nylon chopping board to catch any liquid, vapour will go through the pump just fine.
I do a lot of exterior bodywork for a local caravan dealer and water ingress at seams is a major problem - good job caravan manufacturers don't build boats!!
Caravan panels are metal or plastic or grp outer face, wood framework in the middle and a decorated ply/thin wood as the face you see inside the caravan.
They usually have the van in the workshop, remove the windows then put several electric fans set on cool pointing at the wet areas and leave them over the weekend.
Im going to fan the sh:t out of this transom. The problem is it's 2 layers of dense marine plywood and a few inches thick.
A soaked transom is a really awkward one for obvious reasons. Even with marine ply, though, you want to be careful not to dry it too quickly or unevenly. In an ideal world you'd want to use time as the best means to dry, with plenty of cool air flow.
Im going to fan the sh:t out of this transom. The problem is it's 2 layers of dense marine plywood and a few inches thick.
A transom's a tricky one because the saturated core is encased by a waterproof shell. No amount of fan power is going to help. The only way the moisture's going to get out is via the way it got in. Very difficult and time consuming if at all, with possible rot of the core while waiting for it to happen and no use of the boat. I'll venture there's many a wet transom invisible and unknown to the owner if the outboard mounting bolts sealant fails.
So what to do? I'm not a professional repairer. This is just what I came up with in my head and food for thought.
Preferably on the inside of the transom (maybe this is in the bilge), wherever is easiest to repair or least noticeable, cut through the gelcoat and fibreglass in several places with a 25mm? holesaw, stopping at the first sign of wood. Prise off and save the discs to be epoxied back in position at a later time. The wet core is now exposed and can dry, and be tested with a caravan damp tester. A portable fan heater can be set on low heat to blow dry air over the core to encourage evaporation. Another heat source could be a portable 500w halogen lamp. Optionally a vacuum pump could be used which causes water to boil or evaporate at a lower temperature and at a higher rate. The transom could be drilled and tapped for a 1/8" bsp nipple to affix the pipe. Alternatively vacuum bagging plastic and gaffer tape could be used and the pump attached this way. When the core is tested at 15% damp or less, something like g-flex 655 can be used to seal it up again (incidentally this also sticks to wet wood under water, it's good stuff to have in). Sand back, apply Flowcoat and fair everything in, hopefully there's a colour match.
Cut back 6" away from where you can see damp timber and replace the timber. It will continue to rot if you dont remove it. Anything else is a temporary solution
It definitely has a bit of rot. I added extra fans. And pulling it out in the sun everyday.
Taking forever ...
If the wood is encased then as others have said, you probably do need to remove a significant amount of the casing of the wood is ever to dry out near RTP.
It sounds pretty bad. Been soaked for a very long time. Even if you dry it out it's probably going to be much weaker. Fine if it's just going to be used on a mellow river with a very small engine but hardly ideal for much else.
Why not bite the bullet and replace it?
The wood is encased with paint.
The lower part is encased with a strip of PVC
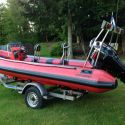
The problem is only in a small corner. If I had to guess , either the boat was dropped , or water came in through the round patch at the back / bottom of the transom. It got wet and never dried.
To replace the transom, means more money and more work. A lot more work.
It's a small problem. Totally fixable. And everything would still be original.
Why not just remove everything from the transom, strip the paint, dig out the rot and repair with resin after treating then repaint and refit trim and stickers? Without the paint it'll all be able to breathe and dry.
Why not just remove everything from the transom, strip the paint, dig out the rot and repair with resin after treating then repaint and refit trim and stickers? Without the paint it'll all be able to breathe and dry.
Good idea TM.
Strip it back.
Dry it out
Stand it vertically on the sponsons
Penetrating epoxy will strengthen rotten wood
Same stuff will act as a yacht varnish
No need for that expensive penetrating epoxy. Low viscosity craft epoxy from eBay is plenty thin enough.
Why not just remove everything from the transom, strip the paint, dig out the rot and repair with resin after treating then repaint and refit trim and stickers? Without the paint it'll all be able to breathe and dry.
As you can tell in the picture 95 % of the transom is still good.
Just a small chip in the corner is bad. It's beginning to dry. Just taking forever.
I already bought the expensive penetrating epoxy and fillers.
I think so. It would help the wood absorb the epoxy better. I'll try to apply heat tomorrow. The outside surface is beginning to get hard again..... very slowly
It definitely has a bit of rot. I added extra fans. And pulling it out in the sun everyday.
Taking forever ...
Just read your full post, the key phrase you have said is "it defiantly has a bit of rot"
That unfortunately normally turns out to be "it had a bit of rot on the surface, but when I started to fix it, it was 4- 5 times worse than I thought"
When wet rot takes hold it will spread internally, and because it's ply It does not matter how much you dry it and soak it with resin. Not only does the wood rot, the adhesive fails. The best solution is to remove as much of the affected area as possible, preferably back to sound, unaffected wood. Then treat the surrounding area and plug or splice a new piece in situ. However, even then it will always be a weak spot given its location.
Yes it will work to some extent. The ply will have lost nearly all of its integrity and strength and no matter how much you soak it in resin, you will never get the strength back.


 Red Mist