Reply
 
Thread Tools Search this Thread
 
Old 16 July 2003, 16:29   #1
Member
 
Country: UK - England
Town: Worcester
Boat name: Cheap 'N' Cheerful
Make: Avon C
Length: 3.5 metres
Engine: Mariner 8HP O/B 2 stroke.
Join Date: Apr 2002
Posts: 134
Leaky valves (Part Deux!).

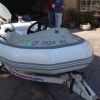
After trying everything I have ordered and received some A7 Vlaves to replace my old A4 valves on my Avon (Thank you for a swift service Polymarine). Can anyone offer any advice on removing and replacing them? I would add that I have a good article printed this month in Sailing Today to help me. However any additional advice would be greatly received.
Thanks in advance Bill.
__________________
dbillyboy is offline   Reply With Quote
Old 17 July 2003, 10:49   #2
Member
 
Country: UK - England
Town: Oxford
Boat name: Salix, Made of the Mist
Make: Tinker, Avon
Length: 3.66, 3.45
Engine: Outboards, 4hp, 25hp, 8hp
Join Date: Jul 2003
Posts: 37
When I replaced the valves in my Tinker, I got them with professionally cut patches.
The valves mounted on the patches. Next I cut out the old valves with a Stanley knife, marked the position of the new patches (with valves in) roughed up the surfaces and stuck down with a 2 part glue.
__________________
Nghost is offline   Reply With Quote
Old 17 July 2003, 21:00   #3
Member
 
Country: UK - England
Town: no
Boat name: no
Make: no
Length: no boat
Engine: no
MMSI: no
Join Date: Apr 2003
Posts: 23
You only need replace the diaphragm of the valve therefore no cutting or gluing but a warning its bloody fiddly
__________________
Storm is offline   Reply With Quote
Old 18 July 2003, 17:20   #4
Member
 
Country: UK - England
Town: Dartmouth
Boat name: TIDEL III
Make: AVON SEARIDER
Join Date: Jun 2003
Posts: 823
leaky valves

C7 valves would have been a better replacement as the valve mechanism is in the external part of the valve making future replacement of the diaphragm fairly easy .As to replacing the diaphragms on A4 valves this is impossible after they have been glued into the tube unless you unseam the tube to gain acess to the back of the valve . Therefore your best bet is to cut out the old valves ,approx 70mm diameter hole , and glue the new valves in after first mounting them in large round patches. if you need any further advice phone.
__________________
paul tilley is offline   Reply With Quote
Old 18 July 2003, 19:28   #5
Member
 
Country: UK - England
Town: Worcester
Boat name: Cheap 'N' Cheerful
Make: Avon C
Length: 3.5 metres
Engine: Mariner 8HP O/B 2 stroke.
Join Date: Apr 2002
Posts: 134
Thank you all for the replies and for the others who have phoned me to help.
Bill.
__________________
dbillyboy is offline   Reply With Quote
Old 01 July 2007, 16:34   #6
Member
 
Country: UK - England
Town: Birkenhead
Boat name: 09
Make: Humber
Length: 5m +
Engine: 60H.P. elpto
Join Date: Jun 2007
Posts: 3
leaky valve

Hi Paul
glad I've registered on the forum your answer alone has made it worth it as I was going to attempt to replace the valves on my Humber.
Thanks mate !!!!!!!!!
Ray Rowland
__________________
mersey1 is offline   Reply With Quote
Old 01 July 2007, 20:21   #7
Member
 
Ribshop's Avatar
 
Country: UK - England
Town: River Hamble
Length: 6m +
Join Date: Oct 2005
Posts: 726
This link may be of some help.

http://www.rib-shop.com/prodtype.asp...ageHistory=cat
__________________
RIB REPAIRS | RE-TUBES | RE-FIT - OUTBOARD SERVICING - ONLINE SHOP FOR RIB & TOHATSU PARTS .
Phone: 01489 556800 www.rib-shop.com
Ribshop is offline   Reply With Quote
Reply


Posting Rules
You may not post new threads
You may not post replies
You may not post attachments
You may not edit your posts

BB code is On
Smilies are On
[IMG] code is On
HTML code is Off
Trackbacks are Off
Pingbacks are Off
Refbacks are Off


All times are GMT. The time now is 04:04.


Powered by vBulletin® Version 3.8.8 Beta 1
Copyright ©2000 - 2024, vBulletin Solutions, Inc.