|
 03 February 2005, 14:07
|
#1
|
|
Member
Country: France
Town: Côte d'Azur
Boat name: Beaver Patrol
Make: Avon Searider SR4
Length: 4m +
Join Date: Jan 2004
Posts: 5,934
|
GRP hull repairs
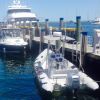
Having removed most of the anifoul and mud from the hull of the 3m I have just bought, I am now ready to start repairing the holes.
Below is a photo of the problem: a nasty gash that goes down the keel. Can anyone give me tips/products to use to repair this.
I only have experiance of filling little hole so this could be interesting!
__________________
|

|

|
|
03 February 2005, 14:30
|
#2
|
|
Member
Country: UK - England
Town: I.O.W/Switzerland
Boat name: HotShot
Make: shakey
Length: 5m +
Engine: 90hp Tohatsu TLDI
Join Date: Jul 2003
Posts: 1,555
|
make the hole bigger and stick a jet drive in 
sorry, couldn't resist 
Interesting hull design. It'll certainly shift with a 30hp on it. My flatacraft which is half a metre longer and probably heavier is pretty lively with a 25hp on it.
__________________
|
|
|
|
|
03 February 2005, 14:47
|
#3
|
|
Member
Country: UK - England
Town: Dorset
Length: 4m +
Join Date: Oct 2003
Posts: 1,410
|
Tim can you get to the crack from both sides? i.e Is it accessible from inside the boat? I think you would have to build it up with fiberglass matting on both sides of the damage.
Best of luck
Alex
__________________
|
|
|
|
|
03 February 2005, 14:48
|
#4
|
|
Member
Country: UK - England
Town: Whitstable
Boat name: Tango
Make: Avon and Narwhal2.4m
Length: 4m +
Engine: 60HP Yamaha
Join Date: Oct 2002
Posts: 966
|
Quote:
|
Originally Posted by Tim M
Having removed most of the anifoul and mud from the hull of the 3m I have just bought, I am now ready to start repairing the holes.
Below is a photo of the problem: a nasty gash that goes down the keel. Can anyone give me tips/products to use to repair this.
I only have experiance of filling little hole so this could be interesting!
|
That looks like a nasty split, do you know any history about how it happened as this could determine how you need to go about fixing it, the gash is along the keel line so it might not be just a case of glassing it up inside and doing a gel coat job on the outside, this sort of damage can occur when boats are beached a lot or if its been lifted full of water.
__________________
|
|
|
|
|
03 February 2005, 14:53
|
#5
|
|
Member
Country: France
Town: Côte d'Azur
Boat name: Beaver Patrol
Make: Avon Searider SR4
Length: 4m +
Join Date: Jan 2004
Posts: 5,934
|
It broke free from it's mooring and was washed up.
I can't really get to the inside unless I remove a piece of the deck. This could be done if absolutly nessassery; there is a recessed bit for a fuel tank. I could cut the bottom out of this and then replace later. However, that is a last resort....
__________________
|
|
|
|
|
03 February 2005, 14:54
|
#6
|
|
Member
Country: UK - England
Town: I.O.W/Switzerland
Boat name: HotShot
Make: shakey
Length: 5m +
Engine: 90hp Tohatsu TLDI
Join Date: Jul 2003
Posts: 1,555
|
I don't know much about GRP repair, but I would say that you would probably have to take quite a lot of the crappy material away from around the hole before you could start to repair, so you'll actually be repairing an even bigger hole 
__________________
|
|
|
|
|
03 February 2005, 15:05
|
#7
|
|
Member
Country: UK - England
Town: Whitstable
Boat name: Tango
Make: Avon and Narwhal2.4m
Length: 4m +
Engine: 60HP Yamaha
Join Date: Oct 2002
Posts: 966
|
Quote:
|
Originally Posted by slimtim
I don't know much about GRP repair, but I would say that you would probably have to take quite a lot of the crappy material away from around the hole before you could start to repair, so you'll actually be repairing an even bigger hole |
Yep your correct, i'm by no way an expert at GRP repair but i have made a few kayaks in the past and in the early days before plastic boats used to repair my own kayaks, sadly quite a lot.
Your really going to need to get under the deck to repair this effectively, so this will be your start point, the easier the access to the site the easier the repair will be, remove all the water soaked and crap mat from around the damaged site and glass in new GRP to bridge the split, the outside is really just to tidy up and gel coat over the repair.
__________________
|
|
|
|
|
03 February 2005, 15:14
|
#8
|
|
Member
Country: UK - England
Town: I.O.W/Switzerland
Boat name: HotShot
Make: shakey
Length: 5m +
Engine: 90hp Tohatsu TLDI
Join Date: Jul 2003
Posts: 1,555
|
Quote:
|
Originally Posted by Bilge Rat
Yep your correct,
|
have it!
Tim, can you post a pic of the deck?
__________________
|
|
|
|
|
03 February 2005, 15:58
|
#9
|
|
Member
Country: UK - England
Town: Worcestershire
Make: Various
Engine: O/B + Sterndrives Di
Join Date: Dec 2003
Posts: 243
|
Split Hull
Tim,
looking at the picture it looks as though the bottom has been worn away by wave action against rocks?
However as already pointed out by others, in order to make an effective repair to such damage you must have total access to the inside of the hull over the entire area before you start.
Once you have access you will need to ensure the entire area to be
re-laminated is bone dry.
At this point try to cover the exterior of the hole with tape or melinex sheeting, any smooth surface material that will form over the hole - this must be firmly affixed with tape or even screws into the hull - to prevent the glass and resin "falling" through the hole.
Once this is acheived you can then re-laminate over the hole and surrounding areas (try to cover at least 150mm either side of the hole if possible) with chopped strand mat and possibly a layer or two of woven roving.
Leave to cure.
Replace any stringers or frames that were removed prior to repair and make good floor panel.
Flip the boat over and grind away edges of original hole (without going through the repaired area) then fill the area with an epoxy repair filler such as Interspeed.
Flat back to produce a smooth fair surface then paint.
|
|
|
|
|
03 February 2005, 16:04
|
#10
|
|
Member
Country: UK - England
Town: I.O.W/Switzerland
Boat name: HotShot
Make: shakey
Length: 5m +
Engine: 90hp Tohatsu TLDI
Join Date: Jul 2003
Posts: 1,555
|
Steve,
I guess he would have to treat whatever he was using to bung the hole with release agent so it can be whipped off again prior to grinding?
Tim
__________________
|
|
|
|
|
03 February 2005, 18:40
|
#11
|
|
Member
Country: UK - England
Town: Worcestershire
Make: Various
Engine: O/B + Sterndrives Di
Join Date: Dec 2003
Posts: 243
|
Possibly but if the material is PVC based then polyester resin or gel will not adhere to it. Hence a thin PVC plastic sheet is ideal for such jobs. But if you use polyethylene or acrylic etc it would be wise to apply a couple of coats of PVA liquid release agent - or at least several coats of release wax.
|
|
|
|
|
03 February 2005, 21:51
|
#12
|
|
Member
Country: France
Town: Côte d'Azur
Boat name: Beaver Patrol
Make: Avon Searider SR4
Length: 4m +
Join Date: Jan 2004
Posts: 5,934
|
Sounds like my next course of action is to cut the bottom of that fuel tank recess. I'll probbaly just replace that with a piece of marine ply sikaflex'ed and scrwed round - it can't be seen once a fuel tank is in place. (Willl post picture of deck in due course).
__________________
|
|
|
|
|
05 February 2005, 13:56
|
#13
|
|
Member
Country: France
Town: Côte d'Azur
Boat name: Beaver Patrol
Make: Avon Searider SR4
Length: 4m +
Join Date: Jan 2004
Posts: 5,934
|
Right.....have just cut the bottom off the recessed fuel tank storage bit. This has revealed the inside of the hole. The hole runs about 2 feet in either direction of the access hole. I can just about get my arm through the gap to access the rest of the hole. I've washed it all down (loads of dust from grinding). Once it's dried out completely what should I do next?
__________________
|
|
|
|
|
05 February 2005, 14:05
|
#14
|
|
Member
Country: UK - England
Town: I.O.W/Switzerland
Boat name: HotShot
Make: shakey
Length: 5m +
Engine: 90hp Tohatsu TLDI
Join Date: Jul 2003
Posts: 1,555
|
Dunno if this will work, but if you need more access you could cut a hole aft of the hole you presently have and then fill it with a plastimo 600mmx355mm hatch (£30 from a plastimo stockist) when you're done. You could then use it as a rope locker or something, although you could have problems with water collecting between hull and deck.
Don't take my advice, its often flawed
__________________
|
|
|
|
|
05 February 2005, 14:07
|
#15
|
|
Member
Country: France
Town: Côte d'Azur
Boat name: Beaver Patrol
Make: Avon Searider SR4
Length: 4m +
Join Date: Jan 2004
Posts: 5,934
|
That's a good idea; your the second person to suggest that!
I'm hoping however that I won't need another hole.....
__________________
|
|
|
|
|
05 February 2005, 18:58
|
#16
|
|
Member
Country: UK - England
Town: Salisbury
Boat name: Blue C
Make: XS 600
Length: 6m +
Engine: 125hp Opti
MMSI: 235082826/235909566
Join Date: Jan 2004
Posts: 1,439
|
Tim. Try this http://www.brokeboats.com/hulls.html
Some good tips which may help. 
Good luck with the project
Brian
|
|
|
|
|
06 February 2005, 17:41
|
#17
|
|
Member
Country: UK - England
Town: Worcestershire
Make: Various
Engine: O/B + Sterndrives Di
Join Date: Dec 2003
Posts: 243
|
Tim can you cut an arched shape section out of the vertical faces of that tank well large enough to be able to see what your laminating fore and aft?
If so this would allow you to see what your a) doing and b) what the final glasswork looks like.
|
|
|
|
|
 Posting Rules
|
You may not post new threads
You may not post replies
You may not post attachments
You may not edit your posts
HTML code is Off
|
|
|
|
 Recent Discussions
 |
|
|
|
|
|
|
|
|
|
|
|
|
|
|
|
|
|
|
|
|
|
|
|
|
|
|
|
|
|
|
|
|
|