|
 14 April 2020, 14:32
|
#1
|
|
Member
Country: UK - Scotland
Town: edinburgh
Boat name: So Tender
Make: avon
Length: 3m +
Engine: yam 30 2t
Join Date: Feb 2019
Posts: 103
|
AVON A7 Valve Replacement
Hi,
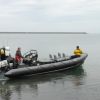
Whilst trying to trace a slow deflation of the bow section of my wee 3.75m Avon rib, i have discovered that the plastic neck of the through hull a7 valve is fractured, and needs replaced......its gonna be a real pain, as access is awkward under the bow... 
I was wondering if anyone knows of a clever way to fix this, without slashing a 100mm slot in the sponson, to get the back of the new valve inside??
Its about time someone came up with an umbrella style valve that you can fix from the outside!!
__________________
|

|

|
|
14 April 2020, 18:13
|
#2
|
|
Member
Country: UK - England
Town: Salisbury
Boat name: TORA
Make: Tornado
Length: 4m +
Engine: Yamaha 60hp
Join Date: Jan 2009
Posts: 148
|
Google it and you will find the method on YouTube
__________________
|
|
|
|
|
14 April 2020, 18:57
|
#3
|
|
Member
Country: UK - Scotland
Town: edinburgh
Boat name: So Tender
Make: avon
Length: 3m +
Engine: yam 30 2t
Join Date: Feb 2019
Posts: 103
|
Thanks Tufty,....but all the youtube vids ive seen only replace the valve guts..... my problem is the moulding within the hull, not the rubber diaphragm.
I was thinking that if ive got to slash the sponson, i would be better doing it 200mm away from the valve itself....i had hoped that someone else had made all the mistakes before me!!.... 
__________________
|
|
|
|
|
15 April 2020, 17:42
|
#4
|
|
Member
Country: USA
Town: Moab
Boat name: Solgear
Make: Avon
Length: 4m +
Engine: Outboard
Join Date: Jul 2019
Posts: 44
|
I have replaced many of those valve springs and plungers which eventually become weak and leak. Those valves are an old design. That is the A7 which evolved into the B7 (Same repair kit) and then to the C7 which is now the D7. I admit the A7 and B7 suck because all the good stuff is in the tube. For $10 USD you can buy the repair kit from NRS (or I also deal them and can ship it). Unscrew the "nut" on the top side when deflated. Put tape over the inflation hole after compressing and twisting the valve to lock it open. While it is inside the tube, spin it 180 degrees (upside down) to see the bottom. Using some wire snips, clip the plunger and don't loose the rubber stopper inside the tube. Spin the valve around so you can see the top and remove the tape and then remove the valve stem and spring. The repair kit will have a new stem. Slip the spring over the stem and insert it into the valve and twist it to lock it open again. Put tape over the inflation hole again. Spin the valve upside down and carefully thread the new rubber flap to the stem. Then spin it again to see the top of the valve and remove the tape. The repair kit will also have a new rubber o-ring for the cap. Thread the "nut" part of the valve back on and its like brand new.
__________________
|
|
|
|
|
15 April 2020, 17:43
|
#5
|
|
Member
Country: USA
Town: Moab
Boat name: Solgear
Make: Avon
Length: 4m +
Engine: Outboard
Join Date: Jul 2019
Posts: 44
|
Here is the link to purchase the repair kit and it also has a video of how to do it.
https://www.nrs.com/product/1483.2/l...lve-repair-kit
__________________
|
|
|
|
|
15 April 2020, 17:56
|
#6
|
|
Member
Country: UK - Scotland
Town: edinburgh
Boat name: So Tender
Make: avon
Length: 3m +
Engine: yam 30 2t
Join Date: Feb 2019
Posts: 103
|
Thanks Solgear.....i know what you mean.
unfortunately its the plastic moulding within the hull, which is fractured at the base of the internal thread. It was super tight, and i think the previous owner has overtightened it, causing the plastic to break.
That bit doesnt fit through the hull, so i think i will need tocut the sponson, beside the valve, to get the new valve in??
I had initially thoughtit would need a repair kit, but it appears that is not the problem.
__________________
|
|
|
|
|
15 April 2020, 18:12
|
#7
|
|
Member
Country: UK - England
Town: Chorley, Lancs
Length: no boat
Join Date: Apr 2012
Posts: 116
|
I never replace an A7 or B7 with the same, I cut out the old valve and replace with a C7 or D7 in a hypalon doubler glued on.
|
|
|
|
|
15 April 2020, 18:18
|
#8
|
|
Member
Country: UK - Scotland
Town: edinburgh
Boat name: So Tender
Make: avon
Length: 3m +
Engine: yam 30 2t
Join Date: Feb 2019
Posts: 103
|
Ok....thanks Dave....are you better to cut the hypalon at the old valve position, or leave that intact and cut a slot beside it??
__________________
|
|
|
|
|
15 April 2020, 20:27
|
#9
|
|
Member
Country: UK - England
Town: Chorley, Lancs
Length: no boat
Join Date: Apr 2012
Posts: 116
|
Either carefully cut around the valve or unscrew the top of the valve and make some cuts from the valve centre to the edge of the valve so the rear part can be removed
|
|
|
|
|
15 April 2020, 20:31
|
#10
|
|
Member
Country: UK - Scotland
Town: edinburgh
Boat name: So Tender
Make: avon
Length: 3m +
Engine: yam 30 2t
Join Date: Feb 2019
Posts: 103
|
Quote:
Originally Posted by Dave Cowell

Either carefully cut around the valve or unscrew the top of the valve and make some cuts from the valve centre to the edge of the valve so the rear part can be removed
|
Ok...thanks Dave....thats this weekends lockdown job..... 
__________________
|
|
|
|
|
15 April 2020, 21:06
|
#11
|
|
Member
Country: UK - England
Town: Chorley, Lancs
Length: no boat
Join Date: Apr 2012
Posts: 116
|
If you cut the valve out it is a good idea to use two doublers, one slightly smaller diameter under a larger one. This gives a double thickness of hypalon for the new valve to tighten onto.
A single doubler is okay if you make multiple slits to get the old one out.
Don’t forget to put the cage from the new valve into the tube before you glue the doubler on.
|
|
|
|
|
15 April 2020, 21:13
|
#12
|
|
Member
Country: UK - Scotland
Town: edinburgh
Boat name: So Tender
Make: avon
Length: 3m +
Engine: yam 30 2t
Join Date: Feb 2019
Posts: 103
|
 ....A single doubler??.....
Ok bud,....i think im on the same page,....but dont go too far away...
That was my thought to cutting a slit, to the side of the valve,....to leave the integrity of the valve aperature in tact.....
But it will be a neater job to do as you suggest...
__________________
|
|
|
|
|
16 April 2020, 16:56
|
#13
|
|
Member
Country: USA
Town: Moab
Boat name: Solgear
Make: Avon
Length: 4m +
Engine: Outboard
Join Date: Jul 2019
Posts: 44
|
I'm with Dave. Don't replace it with an A7 or B7, go with a C7 or D7. Cut the smallest hole that you can to remove the valve. Make a doughnut with a piece of hypalon about 25 cm in diameter with the center hole just big enough for the valve shaft. Before gluing the doughnut on, put the valve "nut" inside the tube and out of the way so you can put pressure on the doughnut patch. After it is dry, you need to find the back side of the valve to mate the two together. I've never had an issue with having only 1 layer of fabric for the valve to seat against and have never needed an inside doughnut patch either. I guess a second layer wouldn't hurt, but seems excessive to me in my humble opinion. Bottom line in gluing it all together is using the correct glue (and not too much - thin to win), the correct fabric, and prepping the fabric cleanly and correctly... NO shine anywhere. You'll find the C7 is way easier to clean and change plunger/spring since you can pull it out of the boat. Good luck!
__________________
|
|
|
|
|
16 April 2020, 18:25
|
#14
|
|
Member
Country: UK - Scotland
Town: edinburgh
Boat name: So Tender
Make: avon
Length: 3m +
Engine: yam 30 2t
Join Date: Feb 2019
Posts: 103
|
Ok...
I was slightly troubled as to how i was gonna get the inner patch through the hole, and properly glued to the inside of the tube....a single 250mm patch on the outside, with the valve seated on that, would be much easier.
Its gonna be a real pain in the derriere, as i need to go head first into the bow section, behind the wheel, with my body hanging over the top of the seat and sponson...kind of upside down.....i must've made a booboo in as previous life to deserve this,!!
Thanks fellas.....
__________________
|
|
|
|
|
16 April 2020, 18:34
|
#15
|
|
Member
Country: UK - England
Town: Chorley, Lancs
Length: no boat
Join Date: Apr 2012
Posts: 116
|
Sorry I could have perhaps been clearer in explaining.
There is no need for a patch on the inside, just the outside.
If we have cut out the valve at North West Ribs we make up a thicker doubler (disc of hypalon with a hole in the centre) using two pieces of hypalon usually 5" and 4" diameter.
These are glued together on the bench with the 4" below the 5" and the complete piece is then glued to the outside of the tube
|
|
|
|
|
16 April 2020, 18:42
|
#16
|
|
Member
Country: UK - Scotland
Town: edinburgh
Boat name: So Tender
Make: avon
Length: 3m +
Engine: yam 30 2t
Join Date: Feb 2019
Posts: 103
|
Perfect Dave....
__________________
|
|
|
|
|
18 April 2020, 19:58
|
#17
|
|
Member
Country: UK - Scotland
Town: edinburgh
Boat name: So Tender
Make: avon
Length: 3m +
Engine: yam 30 2t
Join Date: Feb 2019
Posts: 103
|
Sorry Dave.....looking at this, im wondering why you would want to:
1. Fit 2 layers of hypalon - at the moment, presumably its just through tube, and a single layer of hypalon.
2. Step the hypalon layers, with the thinner layer against the tube - surely that will reduce the adhesive contact area, where the outer layer steps over the inner layer.....is the idea to make the valve seat stiffer??...
I notice that the a7 valve has offset ridges at both sides of the hypalon contact area, presumably to try and seal to the single layer hypalon - will an additional layer of patch not create another possibility for a leak??
Sorry....am i being neurotic??
__________________
|
|
|
|
|
27 April 2020, 15:45
|
#18
|
|
Member
Country: UK - Scotland
Town: edinburgh
Boat name: So Tender
Make: avon
Length: 3m +
Engine: yam 30 2t
Join Date: Feb 2019
Posts: 103
|
So...i had put this off longer than i should've.....
Removed the old a7 valve, and broken innerds.
Oversized the existing hole through the hypalon, to allow the new valve seat to fit inside the sponson.
Made up a "doubler"- 2 layers of hypalon glued together, with the larger part overlapping the new hole size by 60mm all the way round.
I made up a horseshoe out of quarter ply, narrow enough to remove through the new valve hole on completion, and another plywood plate to sandwich the new valve in place
I used bostik inflateable boat repair glue, with 2 thin coats, as directed, and stuck the doubler in place.
Using all the skills of a practiced gynecologist, I then wangled the ply horseshoe around the new patch on the inside, and sandwiched the new patch with the plywood on the outside with a pair of G clamps softly nipped up, and left to cure.
Tomorrow will tell!!
__________________
|
|
|
|
|
30 April 2020, 17:03
|
#19
|
|
Member
Country: UK - Scotland
Town: edinburgh
Boat name: So Tender
Make: avon
Length: 3m +
Engine: yam 30 2t
Join Date: Feb 2019
Posts: 103
|
Thank you for all the advice and assistance.
Valve replaced and air tight
All is well now....except for the confinement
Stay safe peeps!!
__________________
|
|
|
|
|
 Posting Rules
|
You may not post new threads
You may not post replies
You may not post attachments
You may not edit your posts
HTML code is Off
|
|
|
|
 Recent Discussions
 |
|
|
|
|
|
|
|
|
|
|
|
|
|
|
|
|
|
|
|
|
|
|
|
|
|
|
|
|
|
|
|
|
|


 Rescue15