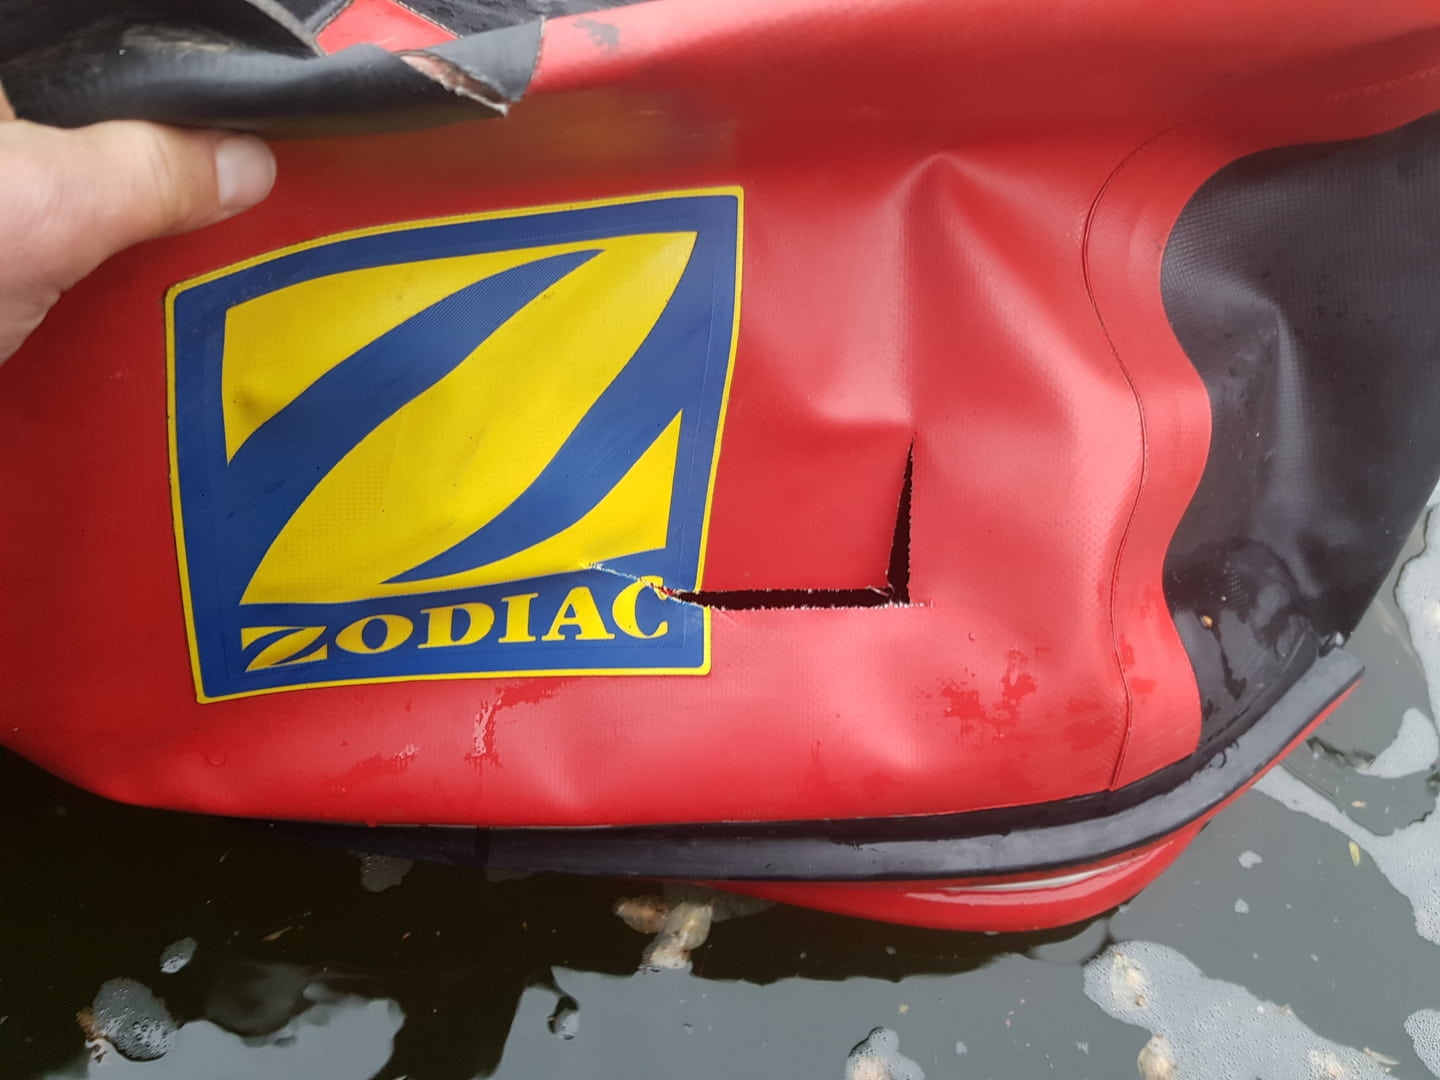
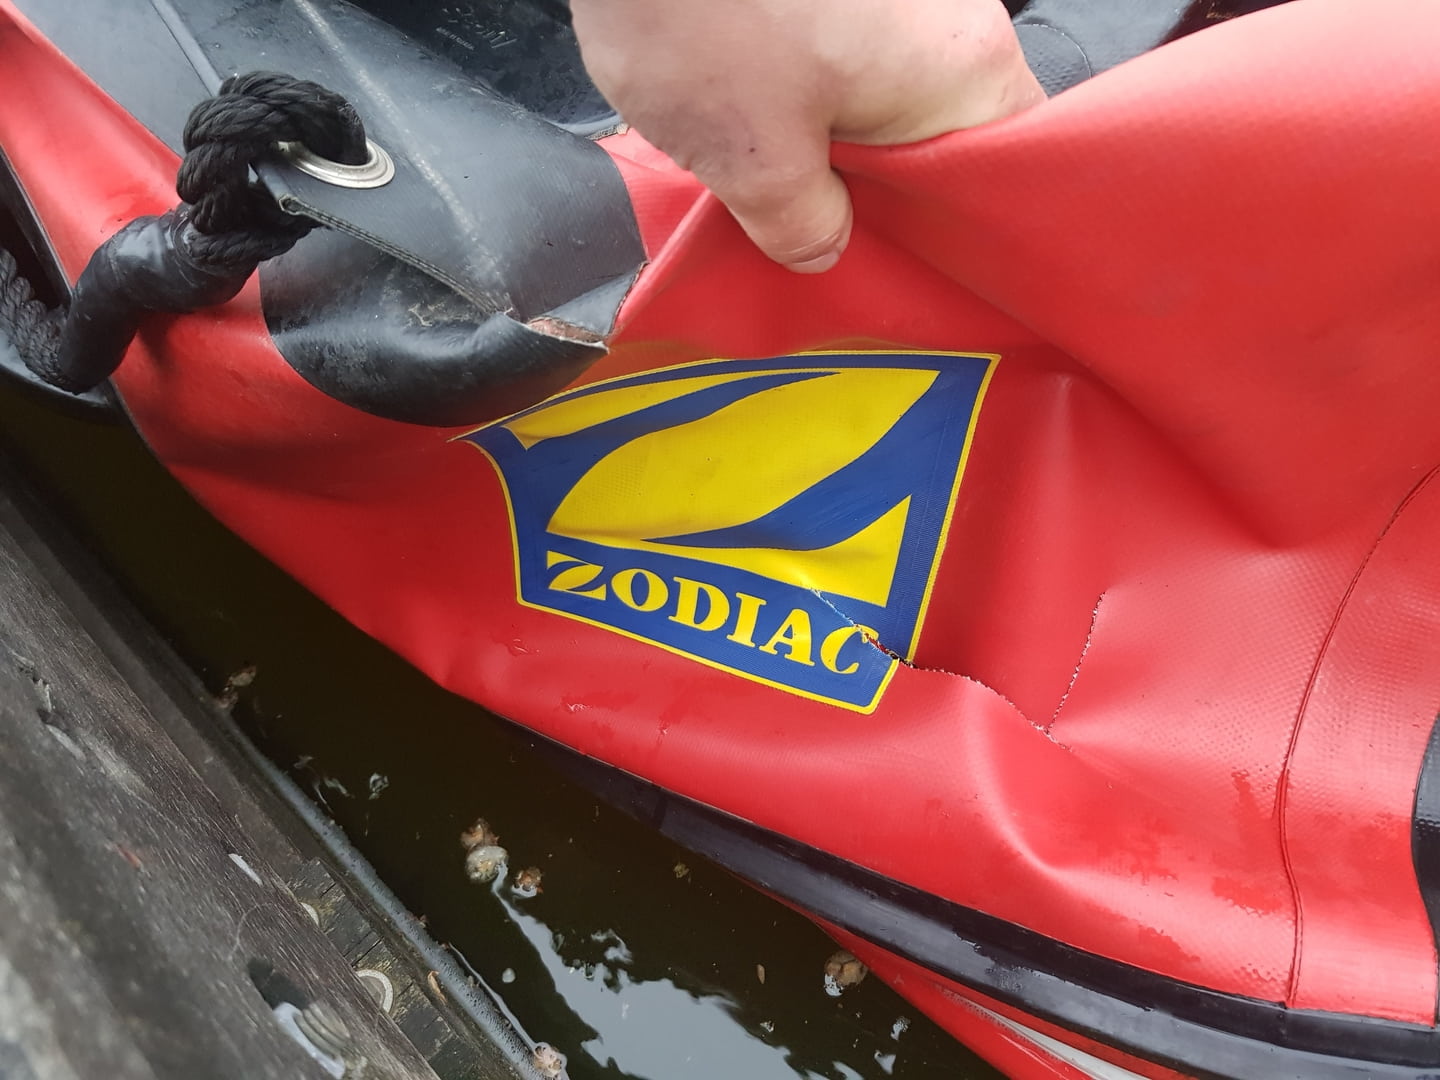
That's quite a hole. What's it on a Zodiac Futura or Pro?
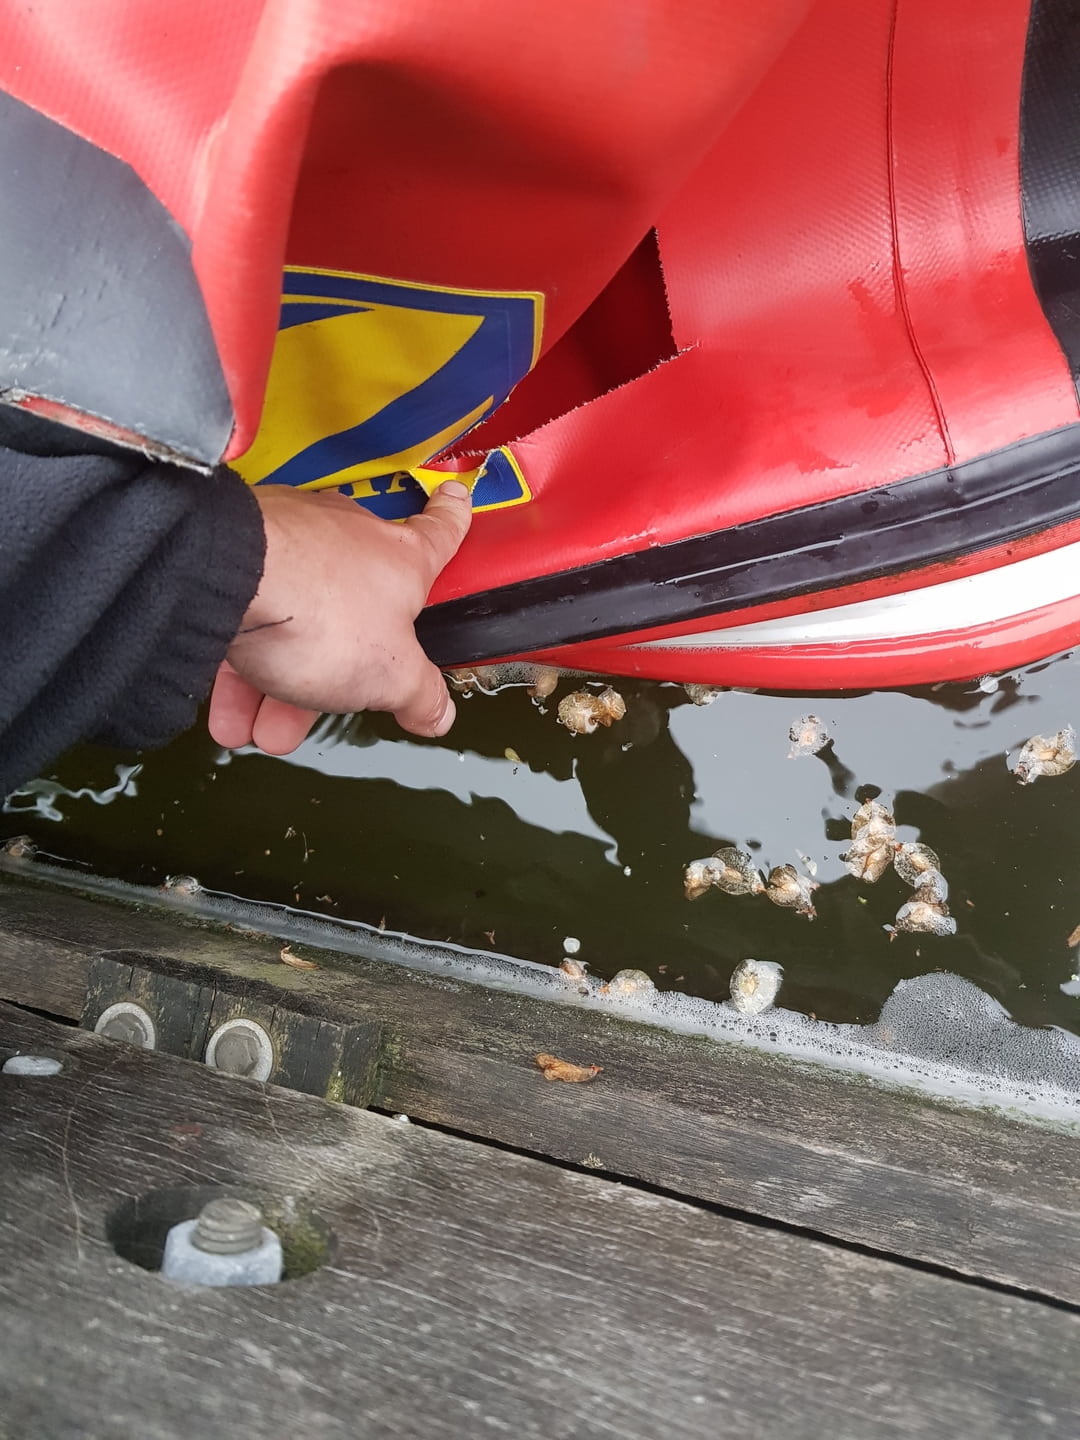
The material is Strongan Duotex, basically PVC. It's actually quite a good size as you can get your hand in to repair. Polymarine 2-part glue is needed, and good ambient temperatures with low humidity to work in, and of course a well ventilated area. The first issue is getting the Zodiac logo off the tube material, as you will need this area clear for the outer patch to sit flush. Pretty sure these badges are thermo bonded on, but you might be able to work it off with a heat gun and plastic scraper.
https://www.polymarine.com/advice/pv...om-pvc-fabric/
As per previous posts on your link, you're probably going to need a patch inside that's at least 2" larger than the cut area diameter, rounded corners, etc. Sand and degrease the inside of the tube and the patch with solvent. If it were me, have a dry run without glue to see how you are going to approach this.
I'd line the inside of the tube with chalk dust and a layer of polythene tacked in place with frog tape. You can extract the polythene later through one of the valves. Once you apply pressure to the inner patch, you don't want it to stick to the tube on the opposite side hence the polythene.
The inside of the tube needs to be masked off after sanding and degreasing, as you're applying glue here too and on the patch. First layer of glue goes on and allow it to dry, say 20-30 minutes. Second layer of glue goes on, after 5 minutes it's ready to apply. As it's a contact adhesive, you get one shot at this, hence the dry run. Start at the section where the branded logo was and work back towards the cone end.
Another option is to line the inside of the tube with polythene and prepare the patch inside the tube, in effect lining up the tube cut to the patch, rather than the other way around. Might be a cleaner way to do it. Once it contacts, use a spreader to apply pleasure from the centre out and leave under weight for 24-48 hours. Afterwards you can inflate, but not to normal operating pressure to make sure nothing has stuck inside. Outer patch is relatively straight forward, just mask off once you've prepared the patch, again rounded corners, sand and degrease. Deflate tube, with the patch applied and left for a further 24-48 hours under weight, now you can pressure test.
Speak to a dealer as you should be able to get that Zodiac logo patch too, in effect it's a third layer and gives the repair strength.
Be interested to see progress on this. If this repair process scares you, take it to a main dealer as I agree its quite involved, but ultimately doable.


 Tickler
 Sula
Sula