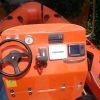
Reply
 
Thread Tools Search this Thread
 
Old 29 December 2012, 22:35   #1
Member
 
Country: UK - England
Town: Darlington
Boat name: Dory
Make: Crompton Seasprint
Length: 7m +
Engine: Mariner 200 outboard
Join Date: Jun 2009
Posts: 240
200HP fuel Filter

Merry Christmas all. I recently put up a post about water in my fuel and being towed in, (oh the humiliation).
With the help of Black Dog Marine on here I was able to get back up and running in good time.

Now running from a fresh fuel source and with all the fuel lines flushed out I was still getting a water in fuel alarm when the engine was running. It turns out the sensor for this alarm is directly under the fuel filter, (which I had not yet changed).

I duly purchased said filter and prepared to fit; 3 steps

1, De-presurize pump thinghy.
2, Remove linkage rod.
3, Use the shaft of a screwdriver between the lugs of the filter cap and unscrew the filter.

Krikey, 3 easy steps how hard can it be? I flicked the kettle on for a cuppa; I'll have this done before the kettle has boiled, (you can see where this is going)!

Steps 1 and 2 no probs.
Step 3, is it just me or has anyone else struggled with this?
I put the screwdriver shaft between the lugs and turned, the 2 lugs I was exerting pressure on bent then snapped off; bugger. I got a bigger screwdriver which was a tighter fit and tried 2 more lugs, same result; bugger bugger. In the garage I have a custom made spanner made from flat bar to service my diving regulators, it has a recangular profile and to say it is a snug fit is an understatement. Guess what the remaining lugs snapped off; bugger. The kettle had long since boiled as had my patience. The die cast of the pump was getting scratched and I was fuming.

Had a cuppa.

Took off the fuel pump and went into the garage. The red filter (or what was left of it) was well and truly stuck in with no more lugs remaining. The fuel pump is in 2 halfs, I undid the screws holding it together; the last one snapped in the bottom half of the unit, OMFG am I cursed?!
At least I could get at the filter from the bottom. It was "very difficult" to remove the filter to say the least and I further scratched the top half of the die cast fuel pump assembly.
It turns out there is a hole drilled in the top half which runs through the threads holding in the fuel filter you can see the hole on images 65 and 66, it allows fuel to run through to the needle at the float valve. The threads at the holes had some nasty burrs on them digging in to the filter making it near impossible to remove the filter without butchering it.

The remedy.
1, remove snapped screw from lower part of pump with some penetrating oil and some good pliers, (this did not work). file snapped screw flat, centre punch and drill out stud and re tap the hole. Done.
2, using needle files remove the sharp burrs projecting into the threads for the fuel filter.
Done.
3, Fabricate a new removal tool thats uses ALL the lugs when being screwed in/ out.
It is the green cog looking thing in photo's 54 and 55.

I fabricated it out of 10mm plate using the new 9" angle grinder that santa brought me. I drilled and tapped a hole in the middle ran a bolt in then TIG welded the bolt on the underside so it will not remove itself when I am trying to unscrew the filter.


I am keen to see if anyone else has had similar issues with this type of filter.

Happy new year to all.


Lee
Attached Thumbnails
Click image for larger version

Name:	DSC_0055.jpg
Views:	175
Size:	93.2 KB
ID:	75104   Click image for larger version

Name:	DSC_0054.jpg
Views:	188
Size:	66.7 KB
ID:	75105   Click image for larger version

Name:	DSC_0066.jpg
Views:	185
Size:	95.5 KB
ID:	75106   Click image for larger version

Name:	DSC_0065.jpg
Views:	180
Size:	92.8 KB
ID:	75107  
__________________
Silent but deaf-lee
diverdad is offline   Reply With Quote
Old 29 December 2012, 22:54   #2
Member
 
Country: UK - England
Town: Dorset & Hants
Boat name: Streaker/Orange
Make: Avon/Ribcraft
Length: 4m +
Engine: 50Yam/25 Mariner
Join Date: Apr 2007
Posts: 5,551
Not had an issue, but I do recall thinking its all very tight when I took the same off two verados...and they weren't mine so I really didn't want to break anything.

I even called the merc dealer to make sure it really was a screwdriver on its side job....was told it was.
__________________
PeterM is offline   Reply With Quote
Old 30 December 2012, 06:19   #3
Member
 
Country: UK - England
Town: Looe
Make: Delta
Length: 4m +
Engine: Mercury
Join Date: Apr 2004
Posts: 1,409
They can be super tight to get on and off. I have had some problems with pattern part filters like these breaking up really easily they snap off on the lugs and cause all sorts of problems. Never had a problem with the genuine ones though. We use the service tool to get them on and off these days but before this came out it was a big flat screw driver to take them off.

And just to annoy you, the service tool like the one you have made costs about £3.00!
__________________
Black Dog Marine
www.blackdogmarine.com
Turbodiesel is offline   Reply With Quote
Old 30 December 2012, 19:31   #4
Member
 
Country: USA
Town: Oakland CA
Length: 3m +
Join Date: Feb 2005
Posts: 6,653
Nice job with the tool. What material did you use? Looks like it was 3D printed or similar.

jky
__________________
jyasaki is offline   Reply With Quote
Old 30 December 2012, 20:30   #5
Member
 
Country: UK - England
Town: Darlington
Boat name: Dory
Make: Crompton Seasprint
Length: 7m +
Engine: Mariner 200 outboard
Join Date: Jun 2009
Posts: 240
Material

Quote:
Originally Posted by jyasaki View Post
What material did you use?
jky
I used 10mm plate and cut it with a angle grinder, there was some filing by hand at the end to ensure a good fit.
__________________
Silent but deaf-lee
diverdad is offline   Reply With Quote
Old 30 December 2012, 20:33   #6
Member
 
Country: UK - England
Town: Darlington
Boat name: Dory
Make: Crompton Seasprint
Length: 7m +
Engine: Mariner 200 outboard
Join Date: Jun 2009
Posts: 240
Quote:
Originally Posted by Turbodiesel View Post
And just to annoy you, the service tool like the one you have made costs about £3.00!
Typical, if I needed to buy one it would have cost me £30!
__________________
Silent but deaf-lee
diverdad is offline   Reply With Quote
Old 31 December 2012, 17:28   #7
Member
 
Country: USA
Town: Oakland CA
Length: 3m +
Join Date: Feb 2005
Posts: 6,653
Quote:
Originally Posted by diverdad View Post
I used 10mm plate and cut it with a angle grinder, there was some filing by hand at the end to ensure a good fit.
OK, now I'm really impressed...

jky
__________________
jyasaki is offline   Reply With Quote
Reply


Posting Rules
You may not post new threads
You may not post replies
You may not post attachments
You may not edit your posts

BB code is On
Smilies are On
[IMG] code is On
HTML code is Off
Trackbacks are Off
Pingbacks are Off
Refbacks are Off


All times are GMT. The time now is 21:55.


Powered by vBulletin® Version 3.8.8 Beta 1
Copyright ©2000 - 2024, vBulletin Solutions, Inc.