Go Back   RIBnet Forums > RIB talk > RIBs & ribbing
Click Here to Login

Reply
 
Thread Tools Search this Thread
 
Old 24 June 2015, 12:42   #1
Member
 
Country: USA
Town: Hingham
Boat name: Milano
Make: AB
Length: 3m +
Engine: Outboard
Join Date: Jun 2015
Posts: 2
Pinhole in hypalon AB near a seam

Hi, new member here. I did search but not finding exactly what I was looking for...

I recently picked up a 10' AB Navigo for $50 that was covered in mildew and "had a leak in one of the tubes". I was a river raft guide for years so I've done my share of hypalon repairs but somehow I've never had to do a repair near a seam. I believe I have located both pinholes, they are on the bottom outside port tube just forward of midships.

The first pinhole is right in the middle of the tube and a tiny pinhole, should be easy. The second pinhole I am pointing to is located about 1cm from the seam.

I was thinking about the best way to repair this. My first thought was to cut out a smaller "D" shaped patch and butt it up against the seam, covering the pinhole. Then do a larger round patch, covering the first patch completely and extending over the seam etc. I'm concerned that the air might find its way along the seam.

I have also thought about slicing open the easy repair to gain access to the hole near the seam. Fix it internally and then have a larger repair to fix.

I also considered a way to "feather" out the seam either with a careful scalpel bevel or by using "goop" and smearing the seam to create a gradual surface for the larger patch to adhere to.

Your thoughts are greatly appreciated.

First hole is under duct tape (was using tape to inflate to find leaks), second is near thumb


Hole in question


Proposed patch, not to scale


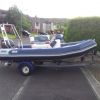
And a couple pics of the boat and some toughening of the hull I've done recently.

Cleaned it with mildew remover and a power washer, the starboard tube shows 2 minutes of scrubbing


Ground down to good glass and epoxied some wear strips. Planning on repainting the transom, interior looks minty

__________________
sailah is offline   Reply With Quote
Old 24 June 2015, 13:41   #2
Member
 
Country: USA
Town: S. Carolina
Boat name: D560
Make: Avon
Length: 5m +
Engine: 2016 Merc 115hp CT
Join Date: Aug 2013
Posts: 1,277
My "lazy" approach:
Sand the surface and clean with tolune
Apply McNetts Aquaseal to the pinhole (it will only take a small amount)
Allow the Aquaseal to cure for a day
Next day, I would mask and lightly scuff the Aquaseal and clean everything with Toluene again. I would then lay up a standard 4" or 5" round patch over everything with Hypalon glue.

When laying the patch, I would lay it down "uphill". Before laying the area over the higher seam, I would use a metal tool, such as a blunted end of aluminum to form the 90 degree angle of edge of the seam tape nicely, then I would continue burnishing everything down.

If you lay the patch, THEN try to burnish and form the angle of the seam tape, you're going to have a lot harder time trying to form that angle. Burnish the patch down as you go, while laying it down "uphill".
__________________
Richard
Gluing geek since 2007
Opinions and intepretations expressed are solely my own and do not express the views or opinions of my employer
office888 is offline   Reply With Quote
Old 24 June 2015, 14:05   #3
Member
 
Country: USA
Town: Hingham
Boat name: Milano
Make: AB
Length: 3m +
Engine: Outboard
Join Date: Jun 2015
Posts: 2
Thanks Richard, that makes sense about burnishing going uphill.

So Aquaseal (just ordered thanks) in the hole first? Should I try and massage some in the hole? I'm thinking about creating like a mushroom plug similar to a tire repair with the aquaseal.

I certainly like this repair better than creating a larger hole.

So if that's your lazy repair, what would be the hard-working repair? I'm a big believer in doing things right and forever the first go around.

Thanks

Peter
__________________
sailah is offline   Reply With Quote
Old 24 June 2015, 14:27   #4
Member
 
Country: USA
Town: S. Carolina
Boat name: D560
Make: Avon
Length: 5m +
Engine: 2016 Merc 115hp CT
Join Date: Aug 2013
Posts: 1,277
Quote:
Originally Posted by sailah View Post
Thanks Richard, that makes sense about burnishing going uphill.

So Aquaseal (just ordered thanks) in the hole first? Should I try and massage some in the hole? I'm thinking about creating like a mushroom plug similar to a tire repair with the aquaseal.

I certainly like this repair better than creating a larger hole.

So if that's your lazy repair, what would be the hard-working repair? I'm a big believer in doing things right and forever the first go around.

Thanks

Peter
Proper way:
Unglue a handle or logo, then cut a hole in the boat. If there is no handle or logo near the area to be repaired, plan on installing a d-ring pad.

Patch the pinhole from the inside of the boat.

Then perform and inside / outside patch on the way out. Reinstall the handle / logo / d-ring pad to hide the patch.

For a pinhole like that though, it is really overkill.
__________________
Richard
Gluing geek since 2007
Opinions and intepretations expressed are solely my own and do not express the views or opinions of my employer
office888 is offline   Reply With Quote
Reply


Posting Rules
You may not post new threads
You may not post replies
You may not post attachments
You may not edit your posts

BB code is On
Smilies are On
[IMG] code is On
HTML code is Off
Trackbacks are Off
Pingbacks are Off
Refbacks are Off


All times are GMT. The time now is 13:31.


Powered by vBulletin® Version 3.8.8 Beta 1
Copyright ©2000 - 2024, vBulletin Solutions, Inc.