|
|
 10 March 2015, 01:28
|
#41
|
|
Member
Country: USA
Town: Mountain View, CA
Boat name: Six Park
Make: True Kit
Length: 3m +
Engine: Suzuki 6
Join Date: Dec 2014
Posts: 236
|
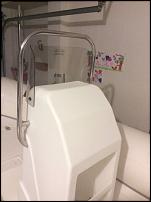
I am thinking of putting the antenna at the right side of the top flat part of the console. The left side would be the fish finder.
__________________
|

|

|
|
10 March 2015, 12:46
|
#42
|
|
Member
Country: UK - England
Town: Dorset & Hants
Boat name: Streaker/Orange
Make: Avon/Ribcraft
Length: 4m +
Engine: 50Yam/25 Mariner
Join Date: Apr 2007
Posts: 5,551
|
Really enjoying this thread - top work  - I'm a huge fan of well rigged small rib  . How about mounting the antenna on the steel frame on the outside of the console - this leaves the console area free for the stuff you will want to put there - (phone, wallet etc ) ?
Pete
__________________
|
|
|
|
|
10 March 2015, 15:52
|
#43
|
|
Member
Country: USA
Town: Mountain View, CA
Boat name: Six Park
Make: True Kit
Length: 3m +
Engine: Suzuki 6
Join Date: Dec 2014
Posts: 236
|
Quote:
Originally Posted by PeterM

How about mounting the antenna on the steel frame on the outside of the console - this leaves the console area free for the stuff you will want to put there - (phone, wallet etc ) ?
|
That's a good idea. No one would be standing on that side so the steel rail would be free.
Also, I should avoid adding any more holes to the console. The plastic doesn't seem very strong. Since I added a big hole for a hatch opening, I am thinking of building an aluminum frame inside the console to add more structural support.
__________________
|
|
|
|
|
10 March 2015, 16:18
|
#44
|
|
Member
Country: UK - England
Town: Dorset & Hants
Boat name: Streaker/Orange
Make: Avon/Ribcraft
Length: 4m +
Engine: 50Yam/25 Mariner
Join Date: Apr 2007
Posts: 5,551
|
You might find when you put a hatch in the hatch frame stiffens up the console again ?
Failing that by using the existing holes for the handle etc may allow you to bolt a frame internally that could bond to the inside of the console ?
I think when you come to put the wheel etc on the dash you may surprise yourself just how much leverage you can apply to the set up.
A friend has a very similar console on his valiant - but its GRP so seems very solid . Mines not far off on my Avon but again is GRP .. pics of it on here somewhere ...
__________________
|
|
|
|
|
10 March 2015, 16:38
|
#45
|
|
Member
Country: USA
Town: Mountain View, CA
Boat name: Six Park
Make: True Kit
Length: 3m +
Engine: Suzuki 6
Join Date: Dec 2014
Posts: 236
|
Quote:
Originally Posted by PeterM
A friend has a very similar console on his valiant - but its GRP so seems very solid . Mines not far off on my Avon but again is GRP .. pics of it on here somewhere ...
|
My console is made of plastic, so it's not remotely as strong as GRP. I bought it solely based on its dimensions and now I am regretting it  Anyway, now I am trying to make lemonade out of a lemon.
__________________
|
|
|
|
|
13 March 2015, 02:05
|
#46
|
|
Member
Country: USA
Town: Mountain View, CA
Boat name: Six Park
Make: True Kit
Length: 3m +
Engine: Suzuki 6
Join Date: Dec 2014
Posts: 236
|
__________________
|
|
|
|
|
13 March 2015, 09:41
|
#47
|
|
Member
Country: UK - England
Town: Portsmouth(ish)
Boat name: Wings
Make: Ribeye
Length: 6m +
Engine: Yamaha F115 AETL
Join Date: Oct 2013
Posts: 615
|
Quote:
Originally Posted by ba_fisher
I am thinking of putting the antenna at the right side of the top flat part of the console. The left side would be the fish finder.
Attachment 103469 |
I would be a little wary of doing this. The "standard" 25W VHF transceiver with a "standard" antenna, with gain of between 1-3dBi and efficiency of probably 65%, requires a safe distance of around 1m (give or take 0.5m depending on antenna). This means that potentially you may be opening yourself up to heating effects of Electromagnetic Frequency (EMF) energy when transmitting. (The effects of heating due to EMF transmissions are not fully known, but Google ICNIRP and you can learn more). (Unfortunately my day to day job is working out safe distances from antennas)!
I also believe most VHF installation guides state a minimum distance between VHF unit and antenna.
Suffice to say, I'd try to put my antenna more than 1m (3'3") away from where I'm standing.
Hope this helps?
__________________
There's weather out there - must be time to RIB!
(Or dive, or ref rugby, or.......)
|
|
|
|
|
13 March 2015, 12:57
|
#48
|
|
Member
Country: USA
Town: Mountain View, CA
Boat name: Six Park
Make: True Kit
Length: 3m +
Engine: Suzuki 6
Join Date: Dec 2014
Posts: 236
|
Hi Ovey,
Thanks for pointing this out. I found a way to raise the antenna 4 ft up, so when I'm sitting the metal part of the antenna will be more than 3 feet away from my head. Do you think this will work?
http://www.continuouswave.com/whaler...HFAntenna.html
__________________
|
|
|
|
|
13 March 2015, 13:43
|
#49
|
|
Member
Country: UK - England
Town: Portsmouth(ish)
Boat name: Wings
Make: Ribeye
Length: 6m +
Engine: Yamaha F115 AETL
Join Date: Oct 2013
Posts: 615
|
No worries, just trying to be helpful. As I'm sure you're aware, the higher the antenna the greater the range anyway, so anything you can do to raise it is in your best interest for reception as well as safety! It looks like that'll do the job nicely.
__________________
There's weather out there - must be time to RIB!
(Or dive, or ref rugby, or.......)
|
|
|
|
|
13 March 2015, 18:52
|
#50
|
|
Member
Country: USA
Town: S. Carolina
Boat name: D560
Make: Avon
Length: 5m +
Engine: 2016 Merc 115hp CT
Join Date: Aug 2013
Posts: 1,277
|
A friend of mine installed the same exact polyethylene console on his dive boat.
We stiffened it up just like you did. We also added a plate of aluminum behind the steering wheel, and added some aluminum plate pieces to the track piece where the floor mounting bolts go through. We thrubolted with backer plates too (although togglers would work).
Zero problems in 4 ft+ chop at 20-25 mph.
__________________
Richard
Gluing geek since 2007
Opinions and intepretations expressed are solely my own and do not express the views or opinions of my employer
|
|
|
|
|
13 March 2015, 22:19
|
#51
|
|
Member
Country: USA
Town: Mountain View, CA
Boat name: Six Park
Make: True Kit
Length: 3m +
Engine: Suzuki 6
Join Date: Dec 2014
Posts: 236
|
Aluminum plate for the steering wheel -- that's a good idea. Will do the same!
__________________
|
|
|
|
|
15 March 2015, 05:17
|
#52
|
|
Member
Country: USA
Town: Mountain View, CA
Boat name: Six Park
Make: True Kit
Length: 3m +
Engine: Suzuki 6
Join Date: Dec 2014
Posts: 236
|
I screwed up one of the transom holes and it's not perpendicular to the transom. I worried that long term this may cause stress and crack the gelcoat.
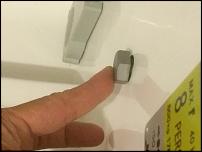
So I used a circular file to 'tilt' the hole by enlarging one corner. Now it looks perfect
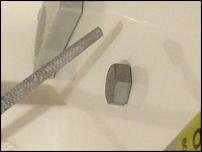
I'll fill the bottom side of the hole with epoxy and drill again to make the hole the right size.
__________________
|
|
|
|
|
15 March 2015, 05:23
|
#53
|
|
Member
Country: USA
Town: Mountain View, CA
Boat name: Six Park
Make: True Kit
Length: 3m +
Engine: Suzuki 6
Join Date: Dec 2014
Posts: 236
|
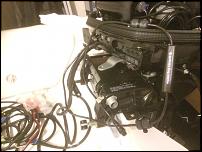
Opened the motor to put in some extra cables for a NMEA 2000 network. That way I can show instruments like trim level, RPM, hours, error codes, etc, on the fish finder.
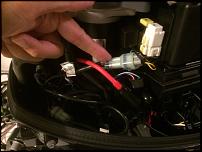
Also installed the main wiring harness into the motor, to connect it with the control box. The smaller wire is the NMEA2000 cable.
__________________
|
|
|
|
|
15 March 2015, 05:28
|
#54
|
|
Member
Country: USA
Town: Mountain View, CA
Boat name: Six Park
Make: True Kit
Length: 3m +
Engine: Suzuki 6
Join Date: Dec 2014
Posts: 236
|
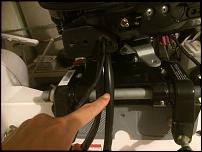
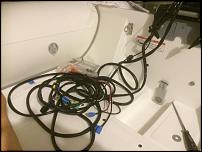
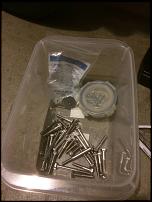
Now I have lots wires coming out of the motor, and that's not counting the two control/shift cables and the steering cable.
Lots of stainless fasteners. The cheapest I found is Home Depot.
__________________
|
|
|
|
|
15 March 2015, 05:34
|
#55
|
|
Member
Country: USA
Town: Mountain View, CA
Boat name: Six Park
Make: True Kit
Length: 3m +
Engine: Suzuki 6
Join Date: Dec 2014
Posts: 236
|
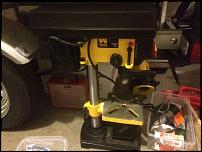
I've bought lots of tools, including this drill press for drilling the aluminum angles. It's much more precise than a hand drill.
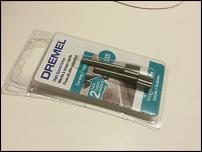
Some dremel bits for hollowing out the wood portions of the transom holes. I will then fill with epoxy and redrill.
__________________
|
|
|
|
|
15 March 2015, 05:41
|
#56
|
|
Member
Country: USA
Town: Mountain View, CA
Boat name: Six Park
Make: True Kit
Length: 3m +
Engine: Suzuki 6
Join Date: Dec 2014
Posts: 236
|
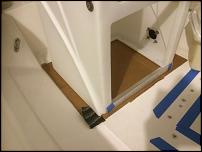
Made one more alum angle to re-enforce the bottom of the console. That way hopefully it will hold up if I accidentally kick it with a heavy rubber boot.
__________________
|
|
|
|
|
15 March 2015, 05:44
|
#57
|
|
Member
Country: USA
Town: Mountain View, CA
Boat name: Six Park
Make: True Kit
Length: 3m +
Engine: Suzuki 6
Join Date: Dec 2014
Posts: 236
|
The NEMA2000 cable.
__________________
|
|
|
|
|
15 March 2015, 06:02
|
#58
|
|
Member
Country: USA
Town: Mountain View, CA
Boat name: Six Park
Make: True Kit
Length: 3m +
Engine: Suzuki 6
Join Date: Dec 2014
Posts: 236
|
Quote:
Originally Posted by office888
A friend of mine installed the same exact polyethylene console on his dive boat.
We stiffened it up just like you did. We also added a plate of aluminum behind the steering wheel, and added some aluminum plate pieces to the track piece where the floor mounting bolts go through. We thrubolted with backer plates too (although togglers would work).
Zero problems in 4 ft+ chop at 20-25 mph.
|
Did you drill over-sized holes on the bottom of the console (where it meets the fiberglass) to allow for expansion? I heard that plastic expands much more than fiberglass, but I am not sure if I need to worry about it since the dimension is just about 15x15 inch.
__________________
|
|
|
|
|
15 March 2015, 21:38
|
#59
|
|
Member
Country: UK - England
Length: 3m +
Join Date: Sep 2008
Posts: 2,762
|
Quote:
Originally Posted by ba_fisher
|
Good chance they are A2 stainless rather than A4 (316). Still stainless but may rust in salty water especially if surface gets damaged during install...
__________________
|

|
|
|
15 March 2015, 21:42
|
#60
|
|
Member
Country: UK - England
Length: 3m +
Join Date: Sep 2008
Posts: 2,762
|
Quote:
Originally Posted by ba_fisher
I screwed up one of the transom holes and it's not perpendicular to the transom. I worried that long term this may cause stress and crack the gelcoat.
Attachment 103581
So I used a circular file to 'tilt' the hole by enlarging one corner. Now it looks perfect
Attachment 103582
I'll fill the bottom side of the hole with epoxy and drill again to make the hole the right size. |
I may be wrong but do people not usually bolt from outside to inside. Assume to reduce crud on the thread when time comes to remove?
Are they stainless? Look like zinc dipped? Should there be a large washer to spread the load properly...?
Is the other side also not flush or is the transoms cross section not a parallelogram but a trapezoid?
__________________
|
|
|
|
|
|
 Posting Rules
|
You may not post new threads
You may not post replies
You may not post attachments
You may not edit your posts
HTML code is Off
|
|
|
|
 Recent Discussions
 |
|
|
|
|
|
|
|
|
|
|
|
|
|
|
|
|
|
|
|
|
|
|
|
|
|
|
|
|
|
|
|
|
|


 Wings
Wings