|
 19 December 2015, 23:59
|
#1
|
|
Member
Country: USA
Town: Kodiak
Boat name: No Name
Make: AVON
Length: under 3m
Engine: Honda 4-stroke
Join Date: Dec 2015
Posts: 3
|
Keel Repair
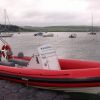
This is an 11' Avon I found washed ashore at Kayak Island, Alaska in 2014. I lugged it onboard our boat and brought it back to Kodiak. Now I'm just getting around to restoring it. My first RIB.
https://photos.google.com/album/AF1Q...VgmYf3NT0zfzRN
I'm new to fiberglass work but have already made some smaller repairs used MAS epoxies, csm and woven mat. The crack pictured is the worst and I'm requesting input on repair method. I'm obviously going to need to cut out a significant portion of the keel. The repair is not accessible from the inside.
Any ideas on how to match the profile of the keel and all the angles?
Thanks in advance.
Andy
__________________
|

|

|
|
20 December 2015, 07:55
|
#2
|
|
Member
Country: UK - England
Town: South Yorks
Boat name: Black Pig
Make: Ribcraft
Length: 5m +
Engine: DF140a
MMSI: 235111389
Join Date: Feb 2008
Posts: 11,887
|
Can't see the photos. Almighty Google insists I update my browser. Just upload them to the forum instead, easier for everyone.
__________________
Rule#2: Never argue with an idiot. He'll drag you down to his level & then beat you with experience.
Rule#3: Tha' can't educate pork.
Rule#4: Don't feed the troll
|
|
|
|
|
20 December 2015, 08:28
|
#3
|
|
Member
Country: UK - England
Length: 3m +
Join Date: Sep 2008
Posts: 2,762
|
404 for me with an uptodate browser.
Pikey for reasons other than seeing photos you probably should update browser...
__________________
|
|
|
|
|
20 December 2015, 09:30
|
#4
|
|
Member
Country: UK - England
Town: South Yorks
Boat name: Black Pig
Make: Ribcraft
Length: 5m +
Engine: DF140a
MMSI: 235111389
Join Date: Feb 2008
Posts: 11,887
|
Quote:
Originally Posted by ShinyShoe

404 for me with an uptodate browser.
Pikey for reasons other than seeing photos you probably should update browser...
|
Nowt wrong with Netscape👍
__________________
Rule#2: Never argue with an idiot. He'll drag you down to his level & then beat you with experience.
Rule#3: Tha' can't educate pork.
Rule#4: Don't feed the troll
|
|
|
|
|
20 December 2015, 13:18
|
#5
|
|
Member
Country: USA
Town: Kodiak
Boat name: No Name
Make: AVON
Length: under 3m
Engine: Honda 4-stroke
Join Date: Dec 2015
Posts: 3
|
photo
here it is. sorry for the hassle.
__________________
|
|
|
|
|
20 December 2015, 16:08
|
#6
|
|
Member
Country: UK - England
Length: 3m +
Join Date: Sep 2008
Posts: 2,762
|
If you can't see what you have from the other side you need to open it up and see what's behind IMHO. There will possibly be frames / stringers which may in theory make repair both easier / harder
__________________
|
|
|
|
|
20 December 2015, 16:13
|
#7
|
|
Member
Country: UK - Scotland
Make: HumberOceanOffshore
Length: 8m +
Engine: Volvo KAD300/DPX
Join Date: Oct 2002
Posts: 5,596
|
You can make a reasonable job of that from the outside but if you want a good job you'd be best cutting an access hole though from the inside. If you do that then you will need to grind back the area inside the hull approximately to your marker lines or possibly out onto the chine flats. Make the grinding as course as possible and ensure you go well into the glass reinforcing, this will give you the largest surface area and also open up some of the glassfibre ends to give a key for the new resin to soak in to. Be aware that your repair will only be stuck to the old resin and will not have a chemical bond as the original build will have done. Therefore, the larger the area the better. Use chopped strand mat along with normal polyester resin to make the repair. Once done, invert the hull, grind back as necessary and make good with more CSM and resin, grind back and fare the repair to the hull shape, but slightly low, and then finish using gelcoat to slightly high. Cut it back to shape and work through the polishing stage from course to fine grit and finally polish with whatever fine compound you have available.
It would be good if you could do the outer repair promptly after the inner repair because you will get chemical bonding of the outer resin to the inner resin provided you get it done before a good deal of the inner curing takes place. Lowering the temperature as soon as possible after the inner repair will prolong the time to cure and give you a little leaway; obviously you need to bring the temp back up for the outer repair and to get good final curing.
Make good the inner deck as necessary.
__________________
JW.
|
|
|
|
|
20 December 2015, 17:27
|
#8
|
|
Member
Country: USA
Town: S. Carolina
Boat name: D560
Make: Avon
Length: 5m +
Engine: 2016 Merc 115hp CT
Join Date: Aug 2013
Posts: 1,277
|
Grind, fiberglass jelly, grind and sand smooth, then spray it with gelcoat
It's a dinghy. No sense getting too fancy with it.
__________________
Richard
Gluing geek since 2007
Opinions and intepretations expressed are solely my own and do not express the views or opinions of my employer
|
|
|
|
|
20 December 2015, 22:20
|
#9
|
|
Member
Country: UK - England
Town: Leicester
Length: 5m +
Engine: 135hp Mercury
Join Date: Sep 2013
Posts: 1,409
|
This might be of interest, note that inside the hull on these is foam, so there is something to hold the filling against the inside of the hull as you pack it in.
Repairing hull damage the Whaler Way
(it's a variation of the official way of doing it: http://continuouswave.com/whaler/ref...tructions.html )
If you do decide to approach from above by cutting a hole in a GRP deck then use a jigsaw with the blade set at 45 degrees with the exposed deck side of the cut wider than the one that's inside. Drill a hole then insert the blade & cut out an area large enough to allow access.
Once the work is done it's a simple matter to line the cut edge with grp mat - of sufficient thickness to replace the material destroyed by the saw blade so the cut out piece will sit flush when refitted - & reseat the cut out piece on to that. Done that with my own boat.
__________________
|
|
|
|
|
03 January 2016, 03:39
|
#10
|
|
Member
Country: USA
Town: Kodiak
Boat name: No Name
Make: AVON
Length: under 3m
Engine: Honda 4-stroke
Join Date: Dec 2015
Posts: 3
|
Thanks for the thoughtful replies, all were duly considered. I would have probably preferred jwalker's solution to approach from the inside, and lay up with csm inside, then out, then patch inside access holes. The problem was there was a 12" wide floor laid up inside the hull for stiffening, with only about a 2" gap between it and the outer hull. There was simply not enough room to work between the decks, and patching the access hole would have been wildly complicated for me.
I still wanted to attempt reinforcement from both inside and out and took a cue from paintman and his link to the Boston Whaler repair playbook. Whaler owners have a technique of carving out a void into the foam core, then stuffing fill material into it to press up against and bond to the inside of the hull. But since my boat isn't foam cored I would provide my on core. I cut out the damaged portion of the hull, and sprayed a can of expanding foam to fill the 2" inner void, sanded down to grade and carved out small pockets on each side to stuff in the fiberglass "mash" made of shredded csm and epoxy. It was not elegant, but it seemed to work. With this tightly packed and still wet, I laid a narrow strip of wetted glass mat on top of the foam, faired it with fiberglass jelly, then put down three layers of CSM wetted with Epoxy.
If I were to attempt this method again I would have used a higher quality foam. The $8 can of foam I bought cured unevenly, with large bubbles, and will probably come apart over time in the marine environment and cause a mess. I did at least check to see that it wouldn't be dissolved by my epoxy (this epoxy had no solvents--polyester could react differently with certain foams). I also thought about water getting trapped in the bilge forward of the foam and had a piece of pvc conduit ready to glue in prior to foaming, to allow water to pass through the foam barrier. Turns out I was able to foam the entire forward part of the bilge with a single can and didn't need to worry about trapping water in the bilge.
I am fairly certain the repair will hold up, but less sure that it was worth the effort and expense. Maybe I would have done just as well simply fairing with a filling compound and patching from the outside.
I've moved on to other problems, and will be posting again shortly. Thanks all.
-Andy
__________________
|
|
|
|
|
03 January 2016, 09:04
|
#11
|
|
Member
Country: UK - England
Town: Leicester
Length: 5m +
Engine: 135hp Mercury
Join Date: Sep 2013
Posts: 1,409
|
Thanks for the update. Nice workround.
__________________
|
|
|
|
|
 Posting Rules
|
You may not post new threads
You may not post replies
You may not post attachments
You may not edit your posts
HTML code is Off
|
|
|
|
 Recent Discussions
 |
|
|
|
|
|
|
|
|
|
|
|
|
|
|
|
|
|
|
|
|
|
|
|
|
|
|
|
|
|
|
|
|
|


 BLACK PIG
 Piglet