Go Back   RIBnet Forums > RIB talk > RIBs & ribbing

Reply
 
Thread Tools Search this Thread
 
Old 30 April 2007, 22:36   #1
Member
 
Country: UK - England
Town: Gloucestershire
Boat name: Pigs Ear
Make: Osprey Vipermax
Length: 7m +
Engine: Honda 225
MMSI: 235090881
Join Date: Dec 2006
Posts: 3,132
Glueing tubes

Got it done this weekend reglued on the last meter of Dstrake on both sides where it had started to come away after years of water pressure against the bottom of the strake. A laborious job but I am happy with the results.

Three tips from Henshaws that I found useful.

1 - get some heat on the strake before trying to bend it round any awkward curves (such as the cones at the rear of the tubes)

2 - Use a mini lorry strap when applying a fairlead for the bowline run the strap from the font eye over the tube to the eye in the boat (if you have one)then crank the strap down, this holds the fairlead tight against the tube whilst the glue cures.

3 - run a bead of Sikaflex along the bottom edge (mask off first) to help prevent the water from blasting its way back up the strake when underway.


If you need to do some glueing and have not tried it before don't be to concerned. If you prep everything well and sand the area to be glued to get off all the old stuff and loose bits thats the main pain in the arse bit done, prime twice then a final coat which you leave for about 15 mins till it feels slightly tacky.

I used some 2" sanding drums off ebay and then the dremel with the smaller sanding drums to get into the tight spaces. It was a bit unerving when peeling the strake away to see pieces of the blue rubber outer skin coming away leaving the white fiberous material behind however I kept on going and its was all fine in fact I think it actually gives a really good surface for the glue to key onto.

I checked with Henshaws who said if you ever think you may have leakage in these patches then when you are putting the first primer coat of glue on if it bubbles just let the air out of the tube, put plenty of glue over the area, let it cure then reinflate.

Its comforting too know that this is another process that I can perform myself if necessary (hopefully not)

Chris
Attached Thumbnails
Click image for larger version

Name:	Image000.jpg
Views:	61
Size:	58.0 KB
ID:	26466   Click image for larger version

Name:	Image001.jpg
Views:	61
Size:	67.5 KB
ID:	26467  
Chris is offline   Reply With Quote
Old 01 May 2007, 07:05   #2
Member
 
Country: UK - Wales
Town: Dorset
Boat name: Vigilant
Make: Humber
Length: 6m +
Engine: 90hp
MMSI: 235052925
Join Date: Feb 2006
Posts: 502
Looks a nice job.....
havener is offline   Reply With Quote
Old 01 May 2007, 07:40   #3
Member
 
Country: UK - England
Town: Bristol
Length: 5m +
Join Date: Mar 2006
Posts: 258
How much do you think it cost you in:

1. Glue.
2. Rubbing Strake
3. Preparation materials
4. Time

???

Cheers,

Orve.
Orville is offline   Reply With Quote
Old 01 May 2007, 08:01   #4
Member
 
Country: UK - England
Town: Gloucestershire
Boat name: Pigs Ear
Make: Osprey Vipermax
Length: 7m +
Engine: Honda 225
MMSI: 235090881
Join Date: Dec 2006
Posts: 3,132
Quote:
Originally Posted by Orville View Post
How much do you think it cost you in:

1. Glue.
2. Rubbing Strake
3. Preparation materials
4. Time

???

Cheers,

Orve.
1. Glue - 1 litre from Henshaws £12.75 (Still got loads left and also made far too much and wasted quite a lot)

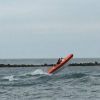
2. Rubbing Strake - I just restuck down the old one at the back, I bought a metre from Henshaws for the Fairlead this cost me 14.61 and Ive still got most of it left over.

3. Preperation materials - 2" Sanding drum (only used 1) £2.50, Seam Roller £2.50 from Local hardware store. 4 cheap 1" paintbrushes £7.50 and old baby feed bottles for mixing glue in and a baby syringe for measuring activator. If you have a dremel or can borrow one I used 1 small sanding drum (3/8") and one larger one (1/2") to get in the tight spaces. Finally some Acetone for degreasing used about 250ml.

4. Time - About 2 hours of prep and the first coat of glue on day 1, On day 2 just 20 mins for another coat of glue in the morning and then later in the day about 1 hour for the final coat of glue then stick on the strake (I did each piece individually) So in total about three and a half hours.

Having done this for the first time I could easily do it in much less time now I know what to expect.

Chris
Chris is offline   Reply With Quote
Reply

Thread Tools Search this Thread
Search this Thread:

Advanced Search

Posting Rules
You may not post new threads
You may not post replies
You may not post attachments
You may not edit your posts

BB code is On
Smilies are On
[IMG] code is On
HTML code is Off
Trackbacks are Off
Pingbacks are Off
Refbacks are Off


Our Communities

Our communities encompass many different hobbies and interests, but each one is built on friendly, intelligent membership.

» More about our Communities

Automotive Communities

Our Automotive communities encompass many different makes and models. From U.S. domestics to European Saloons.

» More about our Automotive Communities

RV & Travel Trailer Communities

Our RV & Travel Trailer sites encompasses virtually all types of Recreational Vehicles, from brand-specific to general RV communities.

» More about our RV Communities

Marine Communities

Our Marine websites focus on Cruising and Sailing Vessels, including forums and the largest cruising Wiki project on the web today.

» More about our Marine Communities


Copyright 2002-2012 Social Knowledge, LLC All Rights Reserved.

All times are GMT. The time now is 11:10.


RIB News Delivered to your Email!

Stay up-to-date with RIB news in your inbox!

unsusbcribe at anytime with one click

Close [X]