Quote:
Originally Posted by morfeopdd

Hi
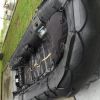
I have the same problem with my old Avon S400 I guest is 78-79 model I so frustate because I can`t install the floorboard
Any help will be appreciate
|
Here is how I did it on my S250:
1. Make sure the boat is fully deflated.
2. Fit the front triangular (or if you prefer trapezoidal) floorboard first, sliding it forwards, making sure it doesn't catch the seams on the 'tape' that joins the floor to the tubes. Ease it forwards until it will drop in front of the fixed board across the boat. It may help to have someone lift the bow from outside the boat.
3. Assemble the other floorboards together with the side stringers outside the boat. Where the floor boards are tapered on the edges, they should be wider at the bottom than the top.
4. Lift the floorboards into the boat. Slide them to the back, locating the rear board under the retainer on the transom. You'll most likely need an assistant for this
5. Make sure the floorboards are seated correctly along the tubes, and that no seams etc are pinched.
6. Push the floorboards as far back as you can, then use a bolster chisel or similar between the floorboard front edge and the fixed floorboard to lever the floorboards into place. Take care not to trap any part of the tube, floor or keel with the chisel or floorboards.
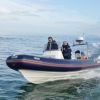
7. Job done - inflate the boat and off you go. It is possible to do it single handed, but is hugely easier with two people.
I never tried the suggestion by others on here to put an oar under the floor to ease things, may be worth a go.
Cheers
Chris