Reply
 
Thread Tools Search this Thread
 
Old 29 June 2014, 17:38   #1
Member
 
Country: Canada
Town: Yellowknife CANADA
Make: Zodiac MkI & Aerotec
Length: 4m +
Engine: OMC 2hp/15hp/60hp
Join Date: Aug 2008
Posts: 135
Drill bit for hull drain?

What would be the best type of drill bit for enlarging an existing hole in the transom of my RIB? The boat is a Zodiac Hurricane 440 so fiberglass with wood core. Right now I have two hull drains that are about 3/4" dia and are unlined so water can to the wood. I want to enlarge these and seal them with new 1" hull drains.
__________________
headdamage is offline   Reply With Quote
Old 29 June 2014, 18:08   #2
Member
 
ian parr's Avatar
 
Country: UK - Wales
Town: Near oswestry
Boat name: Billy may
Make: Tornado 5.3
Length: 5m +
Engine: 90 yamaha
MMSI: 235109146
Join Date: Nov 2013
Posts: 119
Hi, you need one of those stepper drill bits, they are cone shaped and range from about 10mm upto 35mm,drill from both sides and a perfect fit should be possible

Sent from my iPad using Rib.net
__________________
ian parr is offline   Reply With Quote
Old 29 June 2014, 18:56   #3
Member
 
Country: Other
Town: Caribbean
Boat name: Rib
Make: Avon
Length: under 3m
Engine: 2.5 Tahatsu outboard
Join Date: Jun 2014
Posts: 106
Quote:
Originally Posted by headdamage View Post
What would be the best type of drill bit for enlarging an existing hole in the transom of my RIB? The boat is a Zodiac Hurricane 440 so fiberglass with wood core. Right now I have two hull drains that are about 3/4" dia and are unlined so water can to the wood. I want to enlarge these and seal them with new 1" hull drains.
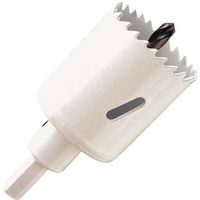
Drill it oversize with a hole saw. You can fill the existing hole (flush) with a bit of wood to facilitate the hole saw drill bit when drilling.

Then fill the oversize hole with fibreglass.

When dry drill the correct size through the fibreglass with another hole saw.


This process will ensure that the wood core is properly protected.

This video may also be of help

[video]
__________________
Doug_G is offline   Reply With Quote
Old 30 June 2014, 14:48   #4
Member
 
Country: UK - Scotland
Boat name: Wildheart
Make: Humber/Delta Seasafe
Length: 5m +
Engine: Merc 60 Clamshell
MMSI: 235068449
Join Date: Apr 2007
Posts: 4,670
I assume you are talking the trunk drains o nthe transom as opposed to a tiddly little thing with a twistlock plug in the floor to stop it filling with water when it's on the trailer kind of thing?

IF we atre talking the transom drains:
One thing to be careful off is that the diameter of thiose holes is flush / tangentical with the floor of the boat - going in witha cone cutter will expand the diameter in all directions, so you may end up creating more problems than you solve.

At least with a holesawyou can tack a bit of ply across the old hole, then "pilot hole" it, so you can then drill in from the outsode (if you have one of these "cartridge" holesaws) - not an issue if you have the "can" type) where the O/D is the teeth (i.e no carrier protruding)
__________________
9D280 is offline   Reply With Quote
Old 30 June 2014, 15:05   #5
Member
 
Country: USA
Town: Oakland CA
Length: 3m +
Join Date: Feb 2005
Posts: 6,653
Quote:
Originally Posted by 9D280 View Post
I assume you are talking the trunk drains o nthe transom as opposed to a tiddly little thing with a twistlock plug in the floor to stop it filling with water when it's on the trailer kind of thing?

IF we atre talking the transom drains:
One thing to be careful off is that the diameter of thiose holes is flush / tangentical with the floor of the boat - going in witha cone cutter will expand the diameter in all directions, so you may end up creating more problems than you solve.
Wouldn't that be true in either case?

jky
__________________
jyasaki is offline   Reply With Quote
Old 30 June 2014, 15:12   #6
Member
 
Country: USA
Town: Seattle
Boat name: Water Dog
Make: Polaris
Length: 4m +
Engine: Yamaha 60hp
Join Date: Apr 2007
Posts: 1,152
Tack on a sheet of plywood to the interior of the transom. The hole saw will wander all over without a pilot hole. Then use a hole saw from the inside out so the bottom of the new hole aligns with the floor (and doesn't gouge the floor)
__________________
captnjack is offline   Reply With Quote
Old 01 July 2014, 17:38   #7
Member
 
Peter_C's Avatar
 
Country: USA
Town: NorCal
Boat name: SHARKY
Make: AB
Length: 4m +
Engine: Honda BF75 & BF5
Join Date: Dec 2009
Posts: 1,907
Quote:
Originally Posted by captnjack View Post
Tack on a sheet of plywood to the interior of the transom. The hole saw will wander all over without a pilot hole. Then use a hole saw from the inside out so the bottom of the new hole aligns with the floor (and doesn't gouge the floor)
You may be able to use a larger piece of plywood and just clamp it to the transom firmly. That way no other penetrations are made.
__________________
Peter_C is offline   Reply With Quote
Old 02 July 2014, 18:37   #8
Member
 
Country: Canada
Town: Yellowknife CANADA
Make: Zodiac MkI & Aerotec
Length: 4m +
Engine: OMC 2hp/15hp/60hp
Join Date: Aug 2008
Posts: 135
The hull is split in two half’s length ways below the deck (Looking into the hull through the drain with an inspection camera) and appears to be full of foam other than a pair of small cavities at the rear of the hull against the transom. Each cavity has a approx. ¾” drain coming out of the transom below the water line. These holes are not glassed/lined and the wood is exposed to water. There is no deck access to these cavities. I’m thinking that I may need to install a pair of inspection hatches in the deck to access these drains to repair them properly. I want to dry and seal up the exposed transom wood and install properly installed drains.

Or would it be better to fill and seal the drain holes and just use the newly installed deck inspection hatches to remove any water when it does get in?

I don’t see any way of making sure the current drain holes are repaired properly without installing the hatches in the deck, or at least cutting through the deck and resealing the deck after the repair.

Longer term would it be worth installing a few hatches along the deck and trying to remove as much of the foam as possible or do I keep it in place?
__________________
headdamage is offline   Reply With Quote
Old 02 July 2014, 18:58   #9
Member
 
Country: USA
Town: Seattle
Boat name: Water Dog
Make: Polaris
Length: 4m +
Engine: Yamaha 60hp
Join Date: Apr 2007
Posts: 1,152
Not sure I'm visualizing your hull correctly, do you have any pictures you could post?

You don't want to be ripping out deck foam without replacing it with plywood (a big job).
__________________
captnjack is offline   Reply With Quote
Old 02 July 2014, 19:13   #10
Member
 
Country: Canada
Town: Yellowknife CANADA
Make: Zodiac MkI & Aerotec
Length: 4m +
Engine: OMC 2hp/15hp/60hp
Join Date: Aug 2008
Posts: 135
I'll try to get some photos up here in the next couple of days.
__________________
headdamage is offline   Reply With Quote
Old 03 July 2014, 05:38   #11
Member
 
Country: Canada
Town: Yellowknife CANADA
Make: Zodiac MkI & Aerotec
Length: 4m +
Engine: OMC 2hp/15hp/60hp
Join Date: Aug 2008
Posts: 135
The center one is fine and properly installed, it is a deck drain.


The two keel/bilge drains are to either side. They seemed to be dry today so I've applied some marine silicone to them to see if that keeps the water out when I put the plugs in. I want to see if the water gets in past the plugs or from somewhere else.
__________________
headdamage is offline   Reply With Quote
Old 04 July 2014, 23:40   #12
Member
 
Country: UK - Scotland
Boat name: Wildheart
Make: Humber/Delta Seasafe
Length: 5m +
Engine: Merc 60 Clamshell
MMSI: 235068449
Join Date: Apr 2007
Posts: 4,670
Quote:
Originally Posted by jyasaki View Post
Wouldn't that be true in either case?

jky
Not really - the floor drain could be inches away from the transom - a trunk needs to be flush with the floor.

I maybe wasn't too clear with my original explanation?

Quote:
Originally Posted by captnjack View Post
Then use a hole saw from the inside out so the bottom of the new hole aligns with the floor (and doesn't gouge the floor)
That was kind of what I was on about - a "standard" one where each saw is it;s own "can" you can do that - but some are like a big cast thing with multiple grooves into which you put the size of blade you need - then you have to do the final cut from the outside as there is likely going to be half an inch of excess blade carrier to foul the floor.


I get the feeling this is one of these "pic speaks 1000 words" moments!
__________________
9D280 is offline   Reply With Quote
Old 05 July 2014, 03:26   #13
Member
 
Country: USA
Town: Oakland CA
Length: 3m +
Join Date: Feb 2005
Posts: 6,653
[QUOTE=9D280;630808]Not really - the floor drain could be inches away from the transom - a trunk needs to be flush with the floor.

I maybe wasn't too clear with my original explanation?[quote]

Yeah; I was looking at a scupper (drains the deck through the transom) vs a bilge drain.

You were talking (I think) about a deck drain into the bilge.

Same page now.

jky
__________________
jyasaki is offline   Reply With Quote
Reply

Thread Tools Search this Thread
Search this Thread:

Advanced Search

Posting Rules
You may not post new threads
You may not post replies
You may not post attachments
You may not edit your posts

BB code is On
Smilies are On
[IMG] code is On
HTML code is Off
Trackbacks are Off
Pingbacks are Off
Refbacks are Off


All times are GMT. The time now is 04:21.


Powered by vBulletin® Version 3.8.8 Beta 1
Copyright ©2000 - 2024, vBulletin Solutions, Inc.