|
 04 October 2017, 18:13
|
#1
|
|
Member
Country: USA
Town: Seminole, FL
Boat name: Spyder Monkey
Make: AVON
Length: 3m +
Engine: Yamaha 40hp
Join Date: Oct 2017
Posts: 8
|
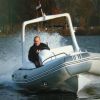
Avon 360 Seasport 360 DL Cone delaminated and took on water
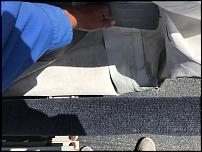
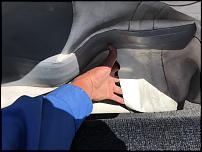
So I just aquired this with the purchase of my 45' trawler. Finally got the engine running (Yamaha 40hp) and started to have some real fun with it when the cone delaminated from the tube below the water line. Due to this, took on water in the tube (about 30 gallons or so so couldn't lift it back up to put on boat...got it out of the water on my boat trailer and noticed the hole (can fit my hand thru it).
I want to repair it as the cone seems alright except for this delimitation. I just need to see if anyone has done this repair and how they would keep the tube in some level of shape to do the repair. Let me know if you have done this, or know how to do it. I have included a few photos, don't know if they help or not.
thanks
rob
__________________
|

|

|
|
04 October 2017, 20:50
|
#2
|
|
Member
Country: USA
Town: S. Carolina
Boat name: D560
Make: Avon
Length: 5m +
Engine: 2016 Merc 115hp CT
Join Date: Aug 2013
Posts: 1,277
|
Three things:
1. That patch is bad. Don't try to touch it up, it won't hold. Remove it.
2. That seam blows out when you run the boat underinflated (it physically tears the material apart)
3. An interior patch will be required. You'll need to get in there with a dremel to remove any edge sealing mastic in the patch area.
I'd recommend you speak to Yusri or Elvin at Solution One Maritime in Tampa. They can fix it.
__________________
Richard
Gluing geek since 2007
Opinions and intepretations expressed are solely my own and do not express the views or opinions of my employer
|
|
|
|
|
05 October 2017, 13:59
|
#3
|
|
Member
Country: USA
Town: Seminole, FL
Boat name: Spyder Monkey
Make: AVON
Length: 3m +
Engine: Yamaha 40hp
Join Date: Oct 2017
Posts: 8
|
Thanks..I have sent them an email this morning about it. Just waiting for a response.
Thanks again for the reference
Rob
|
|
|
|
|
05 October 2017, 14:25
|
#4
|
|
Member
Country: USA
Town: Seminole, FL
Boat name: Spyder Monkey
Make: AVON
Length: 3m +
Engine: Yamaha 40hp
Join Date: Oct 2017
Posts: 8
|
The real question I would like answered is how does one hold the tube in its shape when applying the patches...both inside and out?
|
|
|
|
|
05 October 2017, 15:32
|
#5
|
|
Member
Country: USA
Town: S. Carolina
Boat name: D560
Make: Avon
Length: 5m +
Engine: 2016 Merc 115hp CT
Join Date: Aug 2013
Posts: 1,277
|
Quote:
Originally Posted by rmasse10

The real question I would like answered is how does one hold the tube in its shape when applying the patches...both inside and out?
|
You don't need to. Contact adhesive is utilized which sticks to itself.
For complex curves, I apply masking tape, then I put index marks on the material and masking tape in order to match the proper curve and location. I do my prep and apply my adhesive per manufacturers instructions. Then, after it is ready for layup, I lightly tack the areas in place first where I have made the index marks. Once the area has been lightly tacked, if everything is kosher, I burnish in between the index marks with moderate pressure, inside-outward. Then, I do a heavy burnish over the entire workpiece.
For seam blowouts like this, I also like to clamp the entire repair in vice clamps after I've done the heavy burnish. This helps prevent weepage at the start and stop of the repair, due to overly wet adhesive at the edges.
After everything is done, I remove the masking tape, and wipe my excess glue line off with toluene, and run any stubburn bits off with the wood handle of my brush or with the blunted steel of my smoothing tool.
__________________
Richard
Gluing geek since 2007
Opinions and intepretations expressed are solely my own and do not express the views or opinions of my employer
|
|
|
|
|
05 October 2017, 15:56
|
#6
|
|
Member
Country: USA
Town: Seminole, FL
Boat name: Spyder Monkey
Make: AVON
Length: 3m +
Engine: Yamaha 40hp
Join Date: Oct 2017
Posts: 8
|
Quote:
Originally Posted by office888
You don't need to. Contact adhesive is utilized which sticks to itself.
For complex curves, I apply masking tape, then I put index marks on the material and masking tape in order to match the proper curve and location. I do my prep and apply my adhesive per manufacturers instructions. Then, after it is ready for layup, I lightly tack the areas in place first where I have made the index marks. Once the area has been lightly tacked, if everything is kosher, I burnish in between the index marks with moderate pressure, inside-outward. Then, I do a heavy burnish over the entire workpiece.
For seam blowouts like this, I also like to clamp the entire repair in vice clamps after I've done the heavy burnish. This helps prevent weepage at the start and stop of the repair, due to overly wet adhesive at the edges.
After everything is done, I remove the masking tape, and wipe my excess glue line off with toluene, and run any stubburn bits off with the wood handle of my brush or with the blunted steel of my smoothing tool.
|
Do you have any before and after shots that you wouldn't mind sharing
|
|
|
|
|
05 October 2017, 18:45
|
#7
|
|
Member
Country: USA
Town: S. Carolina
Boat name: D560
Make: Avon
Length: 5m +
Engine: 2016 Merc 115hp CT
Join Date: Aug 2013
Posts: 1,277
|
Quote:
Originally Posted by rmasse10
Do you have any before and after shots that you wouldn't mind sharing
|
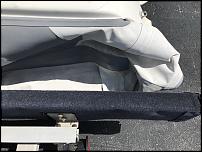
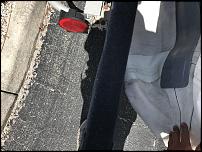
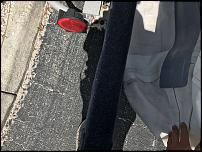
This is one after I fixed it. Highlighted area in red was the blowout.
I didn't worry about cleaning the excess adhesive, since I glued an anti-wear patch over it.
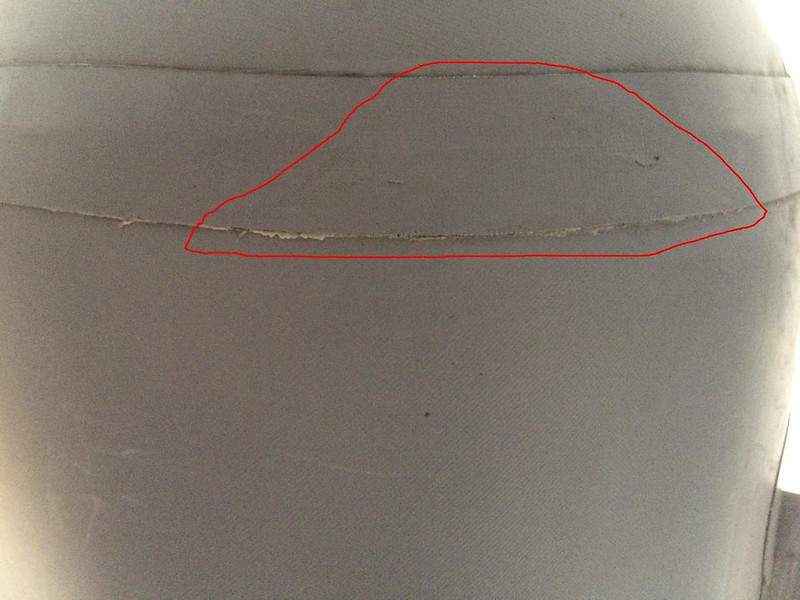 yl dlx seam 001 highlighted yl dlx seam 001 highlighted by anirich888, on Flickr
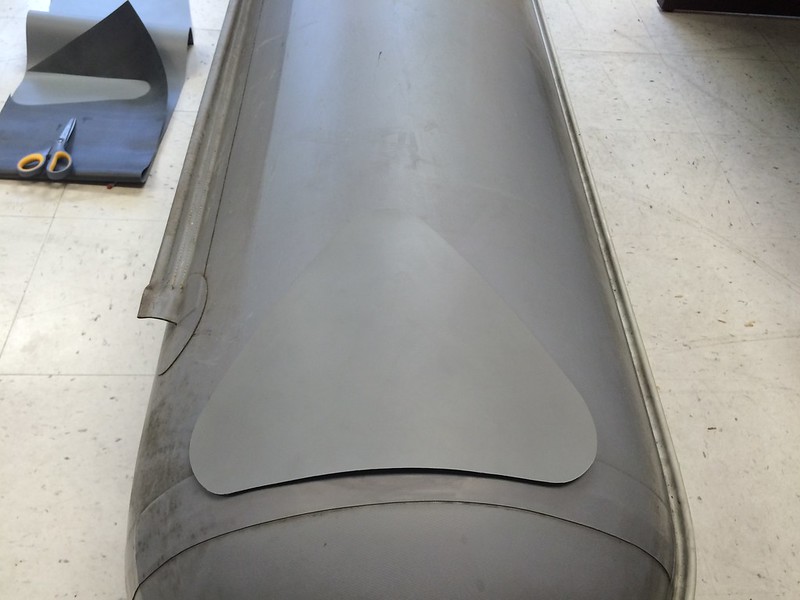 tube 1 tube 1 by anirich888, on Flickr
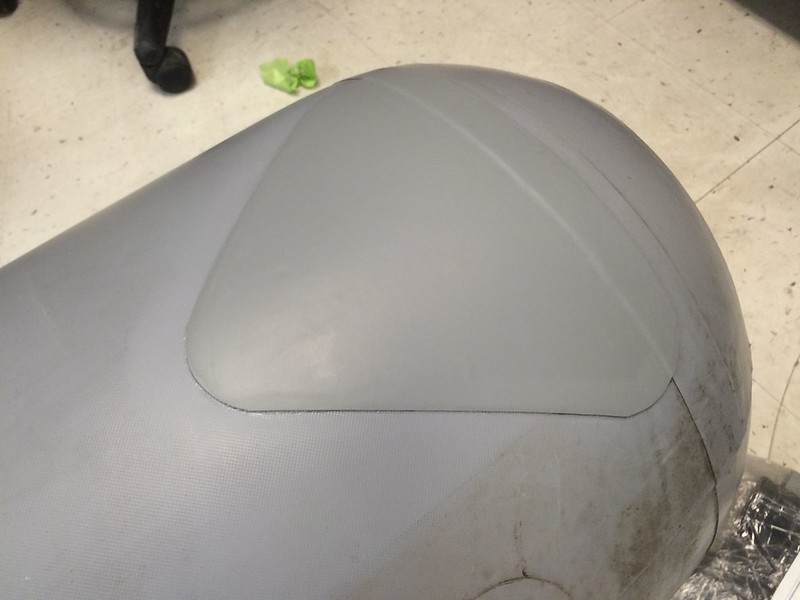 tube 2 tube 2 by anirich888, on Flickr
__________________
Richard
Gluing geek since 2007
Opinions and intepretations expressed are solely my own and do not express the views or opinions of my employer
|
|
|
|
|
06 October 2017, 14:28
|
#8
|
|
Member
Country: USA
Town: Seminole, FL
Boat name: Spyder Monkey
Make: AVON
Length: 3m +
Engine: Yamaha 40hp
Join Date: Oct 2017
Posts: 8
|
Quote:
Originally Posted by office888
|
Look great but how did you do the inside patch...that one seems impossible or extremely difficult to do
|
|
|
|
|
06 October 2017, 14:35
|
#9
|
|
Member
Country: USA
Town: S. Carolina
Boat name: D560
Make: Avon
Length: 5m +
Engine: 2016 Merc 115hp CT
Join Date: Aug 2013
Posts: 1,277
|
Quote:
Originally Posted by rmasse10
Look great but how did you do the inside patch...that one seems impossible or extremely difficult to do
|
I deemed it not necessary for that tube, the actual leakage spot was only maybe 1/2" opened, the surface was very clean, and it was given more than enough time to cure slowly under clamp pressure in a climate controlled area.
For an inside patch though on this tube, if I had to, I would make an incision near the bolt rope area. It is hidden during regular use.
On your boat, I would either peel back the rubstrake and make the incision there, or I'd do it on the top of the tube, depending on how much you cared about function vs cosmetics.
If the opening is large enough in to the cone already, I would simply do the patch for the cone side blind.
Tube repair is not an exact science. Technician skill and comfort is the key factor.
__________________
Richard
Gluing geek since 2007
Opinions and intepretations expressed are solely my own and do not express the views or opinions of my employer
|
|
|
|
|
06 October 2017, 14:39
|
#10
|
|
Member
Country: USA
Town: Seminole, FL
Boat name: Spyder Monkey
Make: AVON
Length: 3m +
Engine: Yamaha 40hp
Join Date: Oct 2017
Posts: 8
|
Im not worried about looks, more function. The hole blow out is about 3-4" wide under the waterline on the bottom. I bascially want to get 1-2 seasons out of it and then have it re-tubed...just not in the budget for this year.
Too bad you are not near me..I would just hire you to do it...lol
|
|
|
|
|
06 October 2017, 14:41
|
#11
|
|
Member
Country: USA
Town: Seminole, FL
Boat name: Spyder Monkey
Make: AVON
Length: 3m +
Engine: Yamaha 40hp
Join Date: Oct 2017
Posts: 8
|
I had it looked at by a couple of guys that do "repair" and retube...etc...One guy said throw the boat out...the other said retube. No one wants to fix. Both sound like the have plenty of business so why bother with a couple hundred job when they can make $5-6k.
|
|
|
|
|
 Posting Rules
|
You may not post new threads
You may not post replies
You may not post attachments
You may not edit your posts
HTML code is Off
|
|
|
|
 Recent Discussions
 |
|
|
|
|
|
|
|
|
|
|
|
|
|
|
|
|
|
|
|
|
|
|
|
|
|
|
|
|
|
|
|
|
|