Reply
 
Thread Tools Search this Thread
 
Old 09 March 2015, 20:27   #1
Member
 
Country: Canada
Town: vancouver Island Nanoose
Boat name: Blue2Summit
Make: Zodiac
Length: 10m +
Engine: 300HP G2 evinrude
Join Date: Aug 2013
Posts: 73
Filling a I/O hole in the transom

Does any one have any advice on the best practice to filling in a hole in a transom where the inboard leg used to be .
Thanks in advance
Jono
__________________
jonoadams75 is offline   Reply With Quote
Old 09 March 2015, 20:43   #2
Member
 
Country: USA
Town: CA
Make: Zodiac RIB-P
Length: 7m +
Engine: Suzuki 250
Join Date: Aug 2010
Posts: 1,235
oohh ooohh ooohh pick me! pick me! I've done that!

It's not that hard (time consuming and you get to be covered in fiberglass dust) or even terribly structural I think. especially when you figure you are bolting the giant outboard bracket over it. I'm sure it could be done with less effort, I bet Ryan has a easier method, but I just made a 2 x 3/4" plywood plug and epoxied it in place.

Grind all inside edges back to clean fiberglass or down to the foam and grind around the edges of the hole in a 12:1 ratio of the thickness of the fiberglass skin. I think it was 1/4 so you grind 3" all round it. Epoxy the plug in place with thickened epoxy (wood flour works nicely) and then overlapping layers of fiberglass until it's level. That according to the fiberglass guys I got my lessons from will create a patch as strong as it was before.

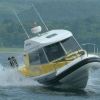
You can see me in all my naivete, Bateau2 - Builder Forums • View topic - 24' Zodiac Project

That is a great fiberglass site. They are good with advise and (shocker) they sell everything you need. The epoxy the sell is good stuff. Less expensive and easy to work with. The 2:1 ratio is good for when I was learning.
__________________
Bigtalljv is offline   Reply With Quote
Old 09 March 2015, 21:03   #3
Member
 
Country: UK - England
Town: Bridport
Boat name: Pic
Make: Halmatic
Length: 7m +
Engine: Outboard
Join Date: Aug 2014
Posts: 273
Iv done this take a look on my rib refurb post. It's not to hard but needs to be done properly
__________________
Mat856 is offline   Reply With Quote
Old 09 March 2015, 21:31   #4
Member
 
Country: Canada
Town: vancouver Island Nanoose
Boat name: Blue2Summit
Make: Zodiac
Length: 10m +
Engine: 300HP G2 evinrude
Join Date: Aug 2013
Posts: 73
Great thanks for the tips Jason i thought i had seen you do something similar
__________________
jonoadams75 is offline   Reply With Quote
Old 09 March 2015, 21:36   #5
Member
 
Country: Canada
Town: vancouver Island Nanoose
Boat name: Blue2Summit
Make: Zodiac
Length: 10m +
Engine: 300HP G2 evinrude
Join Date: Aug 2013
Posts: 73
Thanks MAT856 looks like you replaced the whole of your transom whereas i just have a big ass hole to fill in ( no pun intended)
__________________
jonoadams75 is offline   Reply With Quote
Old 09 March 2015, 21:50   #6
Member
 
Country: UK - England
Town: Bridport
Boat name: Pic
Make: Halmatic
Length: 7m +
Engine: Outboard
Join Date: Aug 2014
Posts: 273
Quote:
Originally Posted by jonoadams75 View Post
Thanks MAT856 looks like you replaced the whole of your transom whereas i just have a big ass hole to fill in ( no pun intended)
Is the strongest way to do it. Iv but a 225 on the back so wanted it strong as poss. May need more power 1 day
__________________
Mat856 is offline   Reply With Quote
Old 09 March 2015, 21:52   #7
Member
 
Country: UK - England
Town: Bridport
Boat name: Pic
Make: Halmatic
Length: 7m +
Engine: Outboard
Join Date: Aug 2014
Posts: 273
Click image for larger version

Name:	image.jpg
Views:	404
Size:	69.2 KB
ID:	103458
__________________
Mat856 is offline   Reply With Quote
Old 09 March 2015, 21:54   #8
Member
 
Country: UK - England
Town: Bridport
Boat name: Pic
Make: Halmatic
Length: 7m +
Engine: Outboard
Join Date: Aug 2014
Posts: 273
Click image for larger version

Name:	image.jpg
Views:	346
Size:	102.2 KB
ID:	103459
__________________
Mat856 is offline   Reply With Quote
Old 10 March 2015, 02:22   #9
Member
 
Country: Canada
Town: vancouver Island Nanoose
Boat name: Blue2Summit
Make: Zodiac
Length: 10m +
Engine: 300HP G2 evinrude
Join Date: Aug 2013
Posts: 73
Wow looks great so you filled the hole then fibreglassed the transom again ?
__________________
jonoadams75 is offline   Reply With Quote
Old 10 March 2015, 07:04   #10
Member
 
Country: UK - England
Town: Bridport
Boat name: Pic
Make: Halmatic
Length: 7m +
Engine: Outboard
Join Date: Aug 2014
Posts: 273
Click image for larger version

Name:	image.jpg
Views:	256
Size:	69.3 KB
ID:	103472

Ye it's the strongest way as it's supported through the hole transome
__________________
Mat856 is offline   Reply With Quote
Old 10 March 2015, 16:03   #11
Member
 
Country: USA
Town: Oakland CA
Length: 3m +
Join Date: Feb 2005
Posts: 6,653
Quote:
Originally Posted by Bigtalljv View Post
oohh ooohh ooohh pick me! pick me! I've done that!
Dammit, Jason, now I've got to change my shirt, as I just spit coffee all over.

jky
__________________
jyasaki is offline   Reply With Quote
Old 11 March 2015, 14:31   #12
Member
 
Country: USA
Town: Stuart, FL
Make: Willard 730
Length: 7m +
Engine: 2 x 175 Suzuki's
Join Date: Nov 2009
Posts: 815
all the advice given is spot on. the transome repair or plug does not need to be load bearing but i would recommend using a composite to fill the hole not plywood. i use coosaboard to fill mine and stack laminate to get the original thickness the add 2 layers of mat 1708 to fill then fair it down and coat in 2000e to protect from water intrusion. Hope this helps. PM me if you have specific questions.
__________________
RyanPratt is offline   Reply With Quote
Reply

Thread Tools Search this Thread
Search this Thread:

Advanced Search

Posting Rules
You may not post new threads
You may not post replies
You may not post attachments
You may not edit your posts

BB code is On
Smilies are On
[IMG] code is On
HTML code is Off
Trackbacks are Off
Pingbacks are Off
Refbacks are Off


All times are GMT. The time now is 18:42.


Powered by vBulletin® Version 3.8.8 Beta 1
Copyright ©2000 - 2024, vBulletin Solutions, Inc.