Go Back   RIBnet Forums > RIB talk > RIB gallery
Click Here to Login

Reply
 
Thread Tools Search this Thread
 
Old 07 September 2005, 20:09   #61
Member
 
Country: UK - England
Town: I.O.W/Switzerland
Boat name: HotShot
Make: shakey
Length: 5m +
Engine: 90hp Tohatsu TLDI
Join Date: Jul 2003
Posts: 1,555
lots of progress

Thank you all for your words of support on this and all your helpful suggestions.

Sorry I haven't posted much for a while, its not that nothing has been happening, quite the opposite in fact.

The console construction is well under way as you can see from the photos. I am using West System 105 epoxy mixed with colloidal silica to give me a paste suitable for filleting all the joins in the plywood. It seems to be working a treat...epoxy is great stuff, it allows you to easily patch up in mistakes you've made in the measuring of the panels! I am holding the plywood panels together with zipties while the epoxy sets (known as the stitch and glue method....used to be used years ago with copper wire to make small plywood boats). The good thing aboutt he zipties is that epoxy doesn't stick to them (very well) so they can be pulled out (with a bit of force and swearing) once the epoxy has set.

A quick guide to epoxy filleting if anyone is interested:
1. drill holes for zipties in both panel to be joined
2. sand panels to open pours and "de-burr" the holes
3. make sure everything is to hand and then mix first small batch of epoxy
4. coat the areas to be joined/filleted with neat epoxy to prime the wood
5. mix colloidal silica in with the remaining epoxy to a peanut butter consistancy
6. slap on a "bead" of epoxy paste onto all joining edges
7. wack edges together and put in zipties. Ensure all edges meet and zipties are tight.
8. mix more epoxy/silica if needed (if you had any left, its probably gone off by now), and start constructing fillets by using the rounded end of a wooden mixing stick
9. thoroughly coat ones hands/hair/face/arms/legs with epoxy
10. leave to set and then pull out zipties with pliers. Fill in any holes at a later date.

Once all the panels are glued together, we will round off all the corners, then coat with G4 varnish (to provide a better adhesion of the polyester resin), lay up layers of GRP followed by tissue (to even out surface), fill and fair with resin mixed with glass bubbles (easy to sand down), then apply paint system.


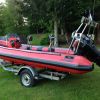
Also done today was the mounting of the engine! No problems encountered here except the arm on the trim sender snapped off when we tilted it up (no idea why) so may try and fix that with epoxy!

Suggestions/comments always welcome.

Pics:
1. The shiney new aluminium fuel tank that I had made for.....the price of a bottle of Scotch - approx 70 litre capacity
Its sitting on the flange of the console to check its all ok
2. sanding/drilling all the panels ready for assembly
3. Me doing the first filleting to be done on the lower console section
4. Mike and I filleting away
5. The almost finished lower console section

Tim
Attached Thumbnails
Click image for larger version

Name:	RN001.jpg
Views:	371
Size:	45.4 KB
ID:	14262   Click image for larger version

Name:	RN002.jpg
Views:	321
Size:	51.1 KB
ID:	14263   Click image for larger version

Name:	RN003.jpg
Views:	374
Size:	38.9 KB
ID:	14264   Click image for larger version

Name:	RN004.jpg
Views:	305
Size:	50.1 KB
ID:	14265   Click image for larger version

Name:	RN005.jpg
Views:	386
Size:	38.0 KB
ID:	14266  

__________________
slimtim is offline   Reply With Quote
Old 07 September 2005, 20:14   #62
Member
 
Country: UK - England
Town: I.O.W/Switzerland
Boat name: HotShot
Make: shakey
Length: 5m +
Engine: 90hp Tohatsu TLDI
Join Date: Jul 2003
Posts: 1,555
More pictures:

1. pic of our first fillets...not bad if I don't say so myself! You can see how we used the zipties here
2. Fuel tank fits snuggly in the jockey seat with exceptional accuracy
3. Checking alignment for the pilot holes in the transom
4. Lower console section in the boat to make sure it fits in...no problems!
5. as above
Attached Thumbnails
Click image for larger version

Name:	RN006.jpg
Views:	357
Size:	31.5 KB
ID:	14267   Click image for larger version

Name:	RN007.jpg
Views:	267
Size:	36.6 KB
ID:	14268   Click image for larger version

Name:	RN008.jpg
Views:	304
Size:	47.7 KB
ID:	14269   Click image for larger version

Name:	RN009.jpg
Views:	349
Size:	39.7 KB
ID:	14270   Click image for larger version

Name:	RN010.jpg
Views:	310
Size:	33.9 KB
ID:	14271  

__________________
slimtim is offline   Reply With Quote
Old 07 September 2005, 20:18   #63
Member
 
Country: UK - England
Town: I.O.W/Switzerland
Boat name: HotShot
Make: shakey
Length: 5m +
Engine: 90hp Tohatsu TLDI
Join Date: Jul 2003
Posts: 1,555
And more...

1. Me making tea very very quickly I seem to spend more time doing this than working on the boat. My helpers drink it by the gallon
2. A simple jig used to obtain the correct position of the flange for the upper console section. This was crucial to make sure the two sections fit together ok

NOTE: this would be a good time to say (because i forgot before) that we are making the console in two sections. This makes it easier to construct and will be a doddle to coat to inside. It will then be filleted together, corners smoothed off, and glassed all over.

3. It was a good 5 seconds before Joe realised he had drilled his thumb to the plywood
4. How much stuff does it take to make a console?!!!!
5. The upper section under construction. Panel nearest is the top dash panel bit to take the gauges
Attached Thumbnails
Click image for larger version

Name:	RN011.jpg
Views:	296
Size:	38.0 KB
ID:	14272   Click image for larger version

Name:	RN012.jpg
Views:	265
Size:	44.4 KB
ID:	14273   Click image for larger version

Name:	RN013.jpg
Views:	325
Size:	42.3 KB
ID:	14274   Click image for larger version

Name:	RN014.jpg
Views:	271
Size:	43.6 KB
ID:	14275   Click image for larger version

Name:	RN015.jpg
Views:	281
Size:	34.3 KB
ID:	14276  

__________________
slimtim is offline   Reply With Quote
Old 07 September 2005, 20:28   #64
Member
 
Country: UK - England
Town: I.O.W/Switzerland
Boat name: HotShot
Make: shakey
Length: 5m +
Engine: 90hp Tohatsu TLDI
Join Date: Jul 2003
Posts: 1,555
last lot for tonight:

1. The garage taken over...You can see all the epoxy tubs, pumps and buckets lined up so everything is to hand when we need it in a hurry
2. Drilling the engine mounting bolt holes
3. Engine fitted and tightening the bolts....James didn't have a beer to hand, so found the next best thing...methylated spirits
4. Tightening the bolts
5. Engine on...wooohooo
Attached Thumbnails
Click image for larger version

Name:	RN016.jpg
Views:	300
Size:	44.5 KB
ID:	14277   Click image for larger version

Name:	RN017.jpg
Views:	333
Size:	34.0 KB
ID:	14278   Click image for larger version

Name:	RN018.jpg
Views:	360
Size:	49.6 KB
ID:	14279   Click image for larger version

Name:	RN019.jpg
Views:	353
Size:	37.6 KB
ID:	14280   Click image for larger version

Name:	RN020.jpg
Views:	398
Size:	55.8 KB
ID:	14281  

__________________
slimtim is offline   Reply With Quote
Old 07 September 2005, 21:59   #65
Member
 
Martin's Avatar
 
Country: UK - England
Town: Pagham Harbour
Boat name: Scallywag
Make: Arran 16
Length: 4m +
Engine: Tohatsu
Join Date: Jul 2001
Posts: 327
mmm nice wheels! Looks like it is coming on well. Keep us informed.

M & A
__________________
Martin is offline   Reply With Quote
Old 07 September 2005, 22:57   #66
RIBnet supporter
 
bogib's Avatar
 
Country: Iceland
Town: Reykjavik
Boat name: Cheesee
Make: Seaquel 600 XS
Length: 6m +
Engine: Mercury 275 Verado
Join Date: Aug 2003
Posts: 1,959
Send a message via Skype™ to bogib
Do we have maiden trip in three weeks time ? I will bring the greeny stuffy in glass bottle for the ceremony.........

Great job to yourself Tim and your helpers

Bogi
__________________
RIBs and ribbing is my life
www.sjosport.is
bogib is offline   Reply With Quote
Old 08 September 2005, 06:47   #67
Member
 
tim griffin's Avatar
 
Country: UK - England
Town: Newport IoW
Boat name: Amean/Pronto/Rumbo
Make: Solent Rib Princess
Length: 7m +
Engine: 200hp Etec 260x 2
MMSI: lots of them
Join Date: Sep 2003
Posts: 1,861
Thats looking excellent Tim, is there any room on your console for a Fixed Vhf and Plotter keep us informed so we can come and see the launch.
__________________
Tim Griffin
RYA Freelance YMI power Powerboat and PWC instructor trainer vhf first aid sea survival Diesel engine radar and navigation instructor
tim griffin is offline   Reply With Quote
Old 08 September 2005, 07:20   #68
Member
 
Jono's Avatar
 
Country: UK - England
Town: Over here
Boat name: S.S. Nobstick
Make: Three Wise Monkeys
Length: 3m +
Engine: 44lbs of thrust....
Join Date: Nov 2003
Posts: 2,127
Looking good Tim. Might I suggest, as someone who used to stitch'n tape wooden boat seams( and fecked' up a few ), that you might want to strengthen them with tape. The joints will be much stronger. If I've missed the part where you said you were going to do that, just put it down to my stupidity....
__________________
Jono is offline   Reply With Quote
Old 08 September 2005, 07:54   #69
Member
 
Nick Hearne's Avatar
 
Country: UK - England
Town: Bucks
Boat name: Blue & Ding Dong
Make: Ribeye,SR4 & Bombard
Length: 6m +
Engine: 115,50 & 15Hp Yams
Join Date: Feb 2004
Posts: 3,252
Excellent job
I love the seating
Attached Thumbnails
Click image for larger version

Name:	RN020.jpg
Views:	293
Size:	55.8 KB
ID:	14285  
__________________
Nick Hearne is offline   Reply With Quote
Old 08 September 2005, 14:48   #70
Member
 
Hightower's Avatar
 
Country: UK - England
Town: Fareham
Length: 6m +
Join Date: Sep 2003
Posts: 7,866
Ooh, can we take her out now? Chuck a battery in, a portable fuel tank and some rope tied to either side of the outboard to steer with and voila!

At least you'll know if you'll sink or swim! Can we? Can we? Go on Tim .

Have to arrange to have those Seat backs delivered to you Tim. I might be out on the water this weekend as I'm having the engine stripped and serviced tomorrow to sort my problems.

Andy
__________________
Hightower is offline   Reply With Quote
Old 08 September 2005, 18:19   #71
Member
 
Country: UK - England
Town: I.O.W/Switzerland
Boat name: HotShot
Make: shakey
Length: 5m +
Engine: 90hp Tohatsu TLDI
Join Date: Jul 2003
Posts: 1,555
Martin: Thanks...I will try and update this more often. Won't be for a few days now because i'm going to the Bestival on the IOW!

Bogi: We'll have to see how things go! I think the stuff in the green bottle will melt the tubes

Tim G: There will be loadsa room for just about everything. VHF, Stereo, plotter, fishfinder, switch panel, 4 gauges, compass etc etc and still be room for more!

Jono: thanks for the suggestion. I had considered it, and may well do that now you have suggested it may be a good idea. I'll see how stiff it is when its all assembled.

Nick:

Andy: I thought you were off somewhere? At the Bestival this weekend, so not so good for me I'm afraid. Let me know if you venture over one evening next week.

Discovered that the engine has to come off again today...won't explain now cos my dinner is ready

Tim
__________________
slimtim is offline   Reply With Quote
Old 08 September 2005, 19:58   #72
Member
 
Hightower's Avatar
 
Country: UK - England
Town: Fareham
Length: 6m +
Join Date: Sep 2003
Posts: 7,866
I was Tim, but it was a short trip to the States this time.

We'll see what we can do?

Andy
__________________
Hightower is offline   Reply With Quote
Old 09 September 2005, 06:20   #73
Member
 
Country: UK - England
Town: Brittany/Portsmouth
Boat name: Merlin
Make: Solent 6.5
Length: 6m +
Engine: 200
MMSI: soon !
Join Date: Jul 2003
Posts: 5,451
Looking forward to the maiden voyage Timothy.

Perhaps when you recover from the Bestival!

Us
__________________
Happy New Resolutions!!! : RIBbing for the craic!!!
The Jackeens is offline   Reply With Quote
Old 19 October 2005, 19:18   #74
Member
 
Country: UK - England
Town: I.O.W/Switzerland
Boat name: HotShot
Make: shakey
Length: 5m +
Engine: 90hp Tohatsu TLDI
Join Date: Jul 2003
Posts: 1,555
blimey, I haven't updated this for over a month! Doesn't time fly when you're being a bum

Update coming shortly...if not tonight, soon!

Tim
__________________
slimtim is offline   Reply With Quote
Old 21 April 2006, 19:40   #75
Member
 
Country: UK - England
Town: I.O.W/Switzerland
Boat name: HotShot
Make: shakey
Length: 5m +
Engine: 90hp Tohatsu TLDI
Join Date: Jul 2003
Posts: 1,555
Update at last!

Ok,

Sorry about the delay over the winter months. The pisc to follow are ones from the end of the summer that I didn't put up before. I have started to do some stuff on it again, but haven't taken any fresh pics yet.

So, where did I leave it? My merry band of helpers and I had fitted the tubes and engine and were well into making the console and bench seat out of plywood and epoxy.

We had made the lower half of the console and had started on the upper section. The bench seat was also in the making.

pics:
1. The top and bottom sections together (although not glued together I don't think) and a chair setup to try out the seating position.
2. Slight design problem - sharp corners digging into my thighs! (see pic caption 4...)
3. brum brum
4. ...problem solved! (after a lot of sawing, damn that epoxy is tough!)
5. Mike getting underway with the bench seat - lots of 1x1 batton, waterproof wood glue, epoxy and ply used for this. My design makes it bloody strong and reasonably light too.
Attached Thumbnails
Click image for larger version

Name:	MM - 5412.jpg
Views:	306
Size:	52.1 KB
ID:	18610   Click image for larger version

Name:	MM - 5414.jpg
Views:	272
Size:	40.7 KB
ID:	18611   Click image for larger version

Name:	MM - 5415.jpg
Views:	221
Size:	53.2 KB
ID:	18612   Click image for larger version

Name:	MM - 5416.jpg
Views:	243
Size:	38.3 KB
ID:	18613   Click image for larger version

Name:	MM - 5417.jpg
Views:	314
Size:	59.2 KB
ID:	18614  

__________________
slimtim is offline   Reply With Quote
Old 21 April 2006, 19:52   #76
Member
 
Country: UK - England
Town: I.O.W/Switzerland
Boat name: HotShot
Make: shakey
Length: 5m +
Engine: 90hp Tohatsu TLDI
Join Date: Jul 2003
Posts: 1,555
1. Bench seat - much of the vertical strength comes from the front and back panels (9mm ply at back to take back rest) which are supported by batton to prevent buckling. You can see that the lower corners are "cut off" so as not to hinder water getting to the scuppers/pump in the event of a stuff.

2. The lay out in the boat - not sure what I would've done if I had got my measurements wrong at this stage!

3. Another view of the bench seat. You can see the strengthening batton which also acts as a flange to support the seat base.

4. Bench seat complete with centre bracing. This makes it very stiff and strong and obviously provides support for the seat base.

5. James sanding off lumps of epoxy ready for the glassing.
Attached Thumbnails
Click image for larger version

Name:	MM - 5420.jpg
Views:	228
Size:	51.2 KB
ID:	18615   Click image for larger version

Name:	MM - 5421.jpg
Views:	295
Size:	44.8 KB
ID:	18616   Click image for larger version

Name:	MM - 5424.jpg
Views:	237
Size:	44.8 KB
ID:	18617   Click image for larger version

Name:	MM - 5436.jpg
Views:	249
Size:	47.0 KB
ID:	18618   Click image for larger version

Name:	MM - 5650.jpg
Views:	281
Size:	58.1 KB
ID:	18619  

__________________
slimtim is offline   Reply With Quote
Old 21 April 2006, 20:03   #77
Member
 
Country: UK - England
Town: I.O.W/Switzerland
Boat name: HotShot
Make: shakey
Length: 5m +
Engine: 90hp Tohatsu TLDI
Join Date: Jul 2003
Posts: 1,555
1. Bench seat fully glassed (apart from lower flange which I hope to do this weekend) and all edges attacked with the angle grinder (the most useful tool in the world!). Pretty good for my forst go at GRP work if I don't say so myself! There are a few areas where I have small bubbles but I ground those out and will fill them with filler. I also attempted to use the glass tissue to produce a smooth surface but by god thats a pain in a arse!

2. All the gear, but no idea

3. James resuming an interesting position whilst cleaning up the inside epoxy

4. From a different angle...don't mess

So, on from these pictures we have screwed/glued in mahogony blocks to screw the SS hinges into (purchased at the boat show - using quality kit here!) and epoxied the insides of both the bench seat and the console for protection. The transom has also been modified in order to give clearance for the steering cable.

Recently, my dad and I spent a few hours drilling through the deck (18mm of ply + 2-3mm of glass!) to get into the under deck cable conduit and I installed my new control cables.

I have devised an ingenious (well, i thought so anyway) way of preventing water flowing up the conduit and bubbling up inside the console. From plastimo I have purchased a plastic flange type arrangement (pic to follow) which I will glue hypalon to in an elephant trunk type arrangement. This will attach to the deck over the hole and the cables will thread up through the middle (see advanced CAD drawing below). I haven't worked out how to seal the upper end yet, maybe just zipties (suggestions welcome).

This plastic flange thingy (plastimo part number: 16928 i think) is only about £2 and would make an ideal flange for a home made elephant trunk.

Right, hope you like the update, I will post more as it happens.

Tata for now.

Tim
Attached Thumbnails
Click image for larger version

Name:	MM - 5736.jpg
Views:	325
Size:	56.8 KB
ID:	18620   Click image for larger version

Name:	MM - 5739.jpg
Views:	233
Size:	57.2 KB
ID:	18621   Click image for larger version

Name:	MM - 5742.jpg
Views:	255
Size:	70.4 KB
ID:	18622   Click image for larger version

Name:	MM - 5748.jpg
Views:	281
Size:	45.7 KB
ID:	18623   Click image for larger version

Name:	flange.jpg
Views:	286
Size:	31.8 KB
ID:	18625  

__________________
slimtim is offline   Reply With Quote
Old 21 April 2006, 20:11   #78
Member
 
Country: UK - Scotland
Make: HumberOceanOffshore
Length: 8m +
Engine: Volvo KAD300/DPX
Join Date: Oct 2002
Posts: 5,596
Tim, you should just have glassed over the white chairs and the consol in a woner.
__________________
JW.
jwalker is offline   Reply With Quote
Old 21 April 2006, 20:37   #79
RIBnet supporter
 
yoyo's Avatar
 
Country: UK - England
Town: Warrington/Anglesey
Make: Menai 480SR.
Length: 4m +
Engine: Tohatsoooooooo 70hp
Join Date: Sep 2005
Posts: 665
slimtim said:

2. Slight design problem - sharp corners digging into my thighs! (see pic caption 4...)
3. brum brum
4. ...problem solved! (after a lot of sawing, damn that epoxy is tough!)


Hi Tim,

Does your nice Ally fuel tank still fit in the console with this mod??

Bob.
__________________
Yoyo.
---------------------------------------------------
life's full of ups "n" downs.
yoyo is offline   Reply With Quote
Old 21 April 2006, 20:42   #80
Member
 
Country: UK - England
Town: I.O.W/Switzerland
Boat name: HotShot
Make: shakey
Length: 5m +
Engine: 90hp Tohatsu TLDI
Join Date: Jul 2003
Posts: 1,555
Quote:
Originally Posted by yoyo

Hi Tim,

Does your nice Ally fuel tank still fit in the console with this mod??

Bob.
Yup, no problem at all, the tank sits at a lower level.

JW, it is tempting just to screw that chair to the deck just to get it finished! You don't want to come down from scotland to finish it while I'm at work do you?!
__________________
slimtim is offline   Reply With Quote
Reply


Posting Rules
You may not post new threads
You may not post replies
You may not post attachments
You may not edit your posts

BB code is On
Smilies are On
[IMG] code is On
HTML code is Off
Trackbacks are Off
Pingbacks are Off
Refbacks are Off


All times are GMT. The time now is 20:42.


Powered by vBulletin® Version 3.8.8 Beta 1
Copyright ©2000 - 2024, vBulletin Solutions, Inc.